In a previous softModder guide, we converted our HTC One smartphone into a legitimate Google Play Edition HTC One, but that conversion cause our bootloader to be locked once again. So, if we ever want to convert it back to a regular Sense-style HTC One, we'll need to unlock the bootloader.
I've already shown how to get S-OFF on the HTC One using Moonshine, and how to do it using HTCdev, but neither Moonshine nor HTCdev support the Google Play Edition's bootloader. Thankfully, there are more benefits to the Google Play Edition than stock Android.
Prerequisites
You'll need to install the Android SDK platform tools and the HTC drivers. You can get the HTC drivers by installing HTC Sync Manager, then uninstalling the program. The drivers will remain on your computer.
Unlock Your Bootloader
Just because HTCdev doesn't work doesn't mean you're stuck with a locked bootloader. It's actually even easier to unlock on the GPE.
With your HTC One GPE connected to your Windows computer, boot into the bootloader using the traditional way, pressing and holding Volume Down and Power. Next, select fastboot using the volume keys and press Power.
Alternatively, use the adb command shown below.
- adb reboot bootloader

Skip the hassle of HTCdev and unlock your bootloader by using the unlock fastboot command!
- fastboot oem unlock

You may get the error above, which is okay. It will still reboot fully unlocked.
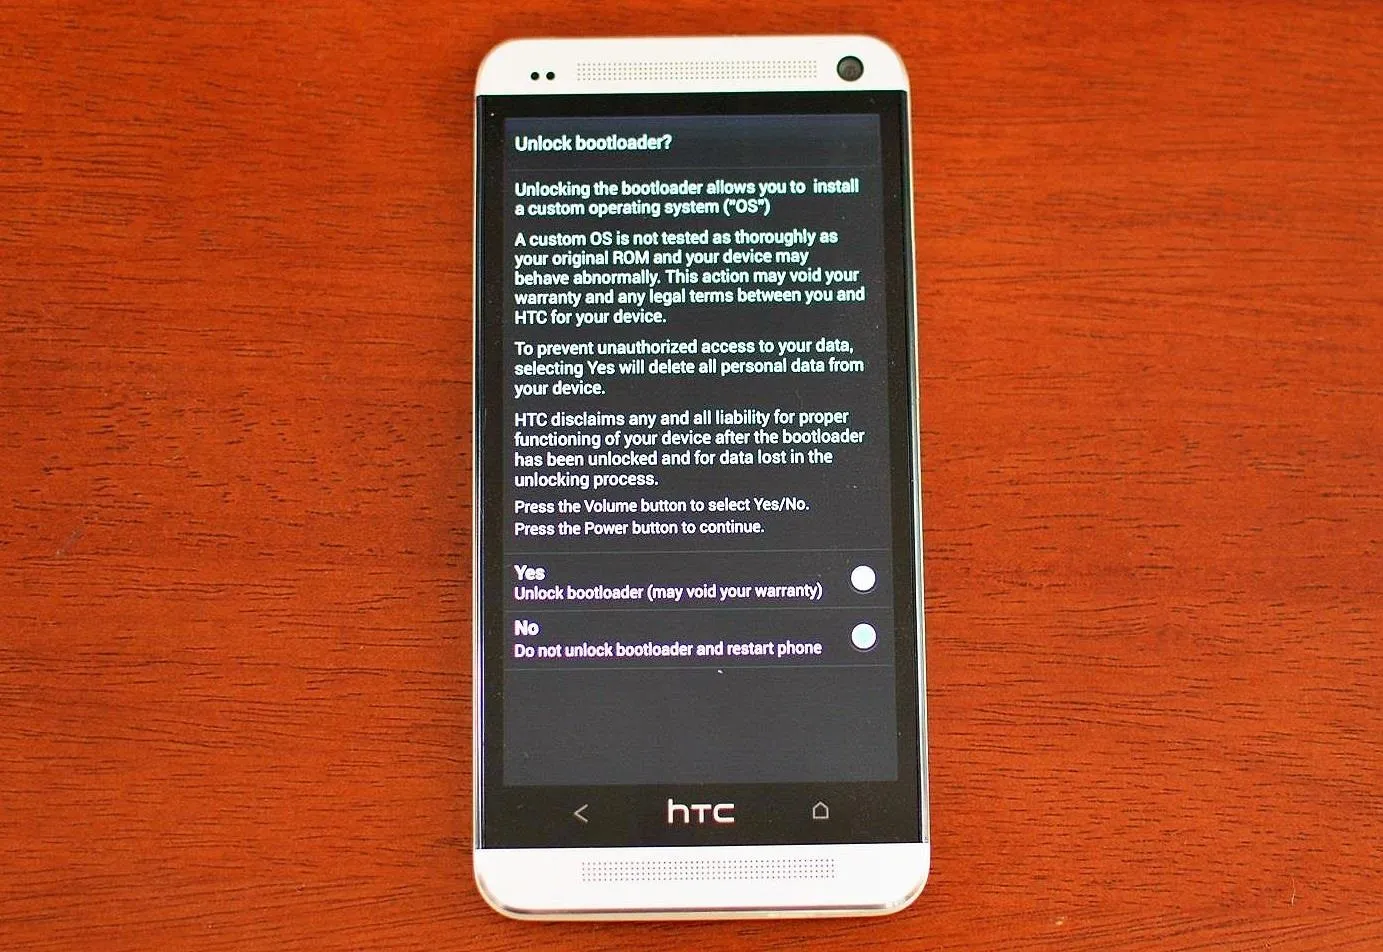
Set Up Your Device
Your phone will now reboot. Set up your Google accounts (unless you plan to flash a custom ROM or revert back to a Sense-style HTC One) and connect to Wi-Fi if available.
Enable USB Debugging
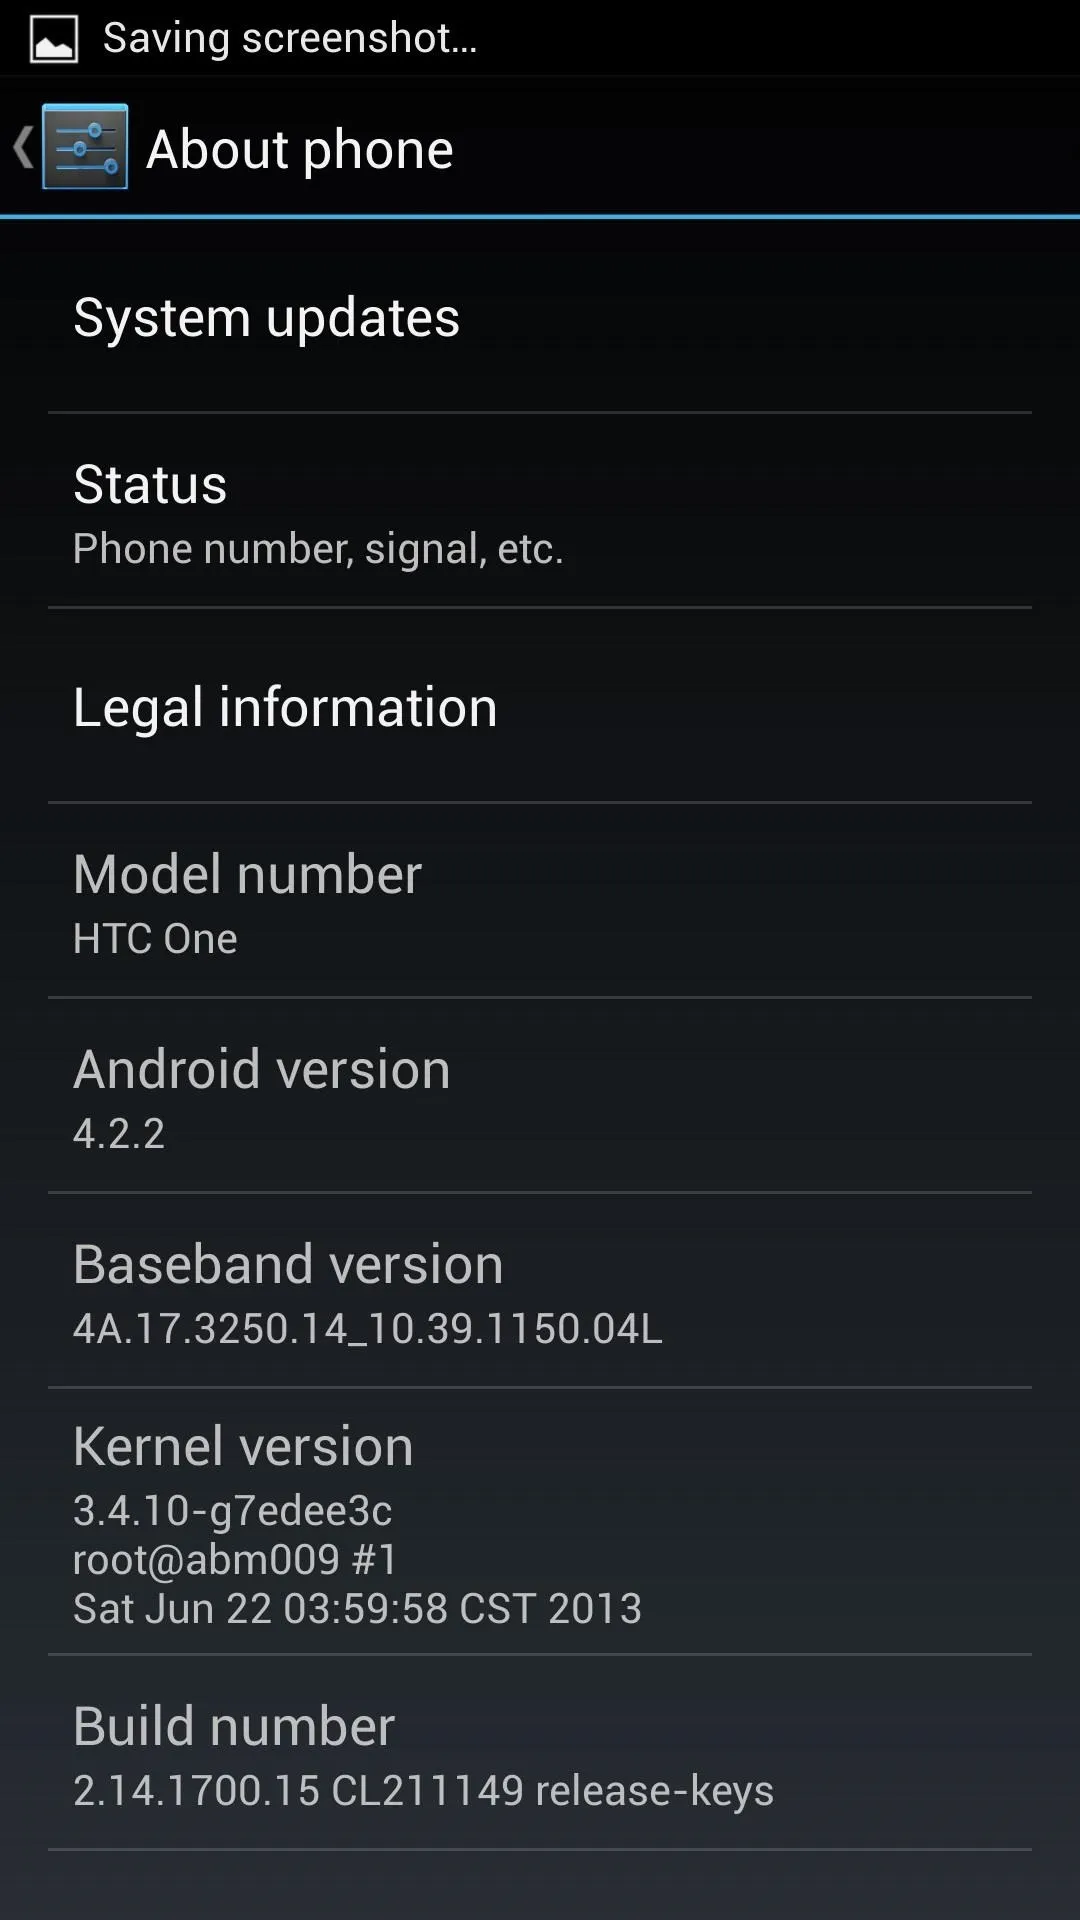
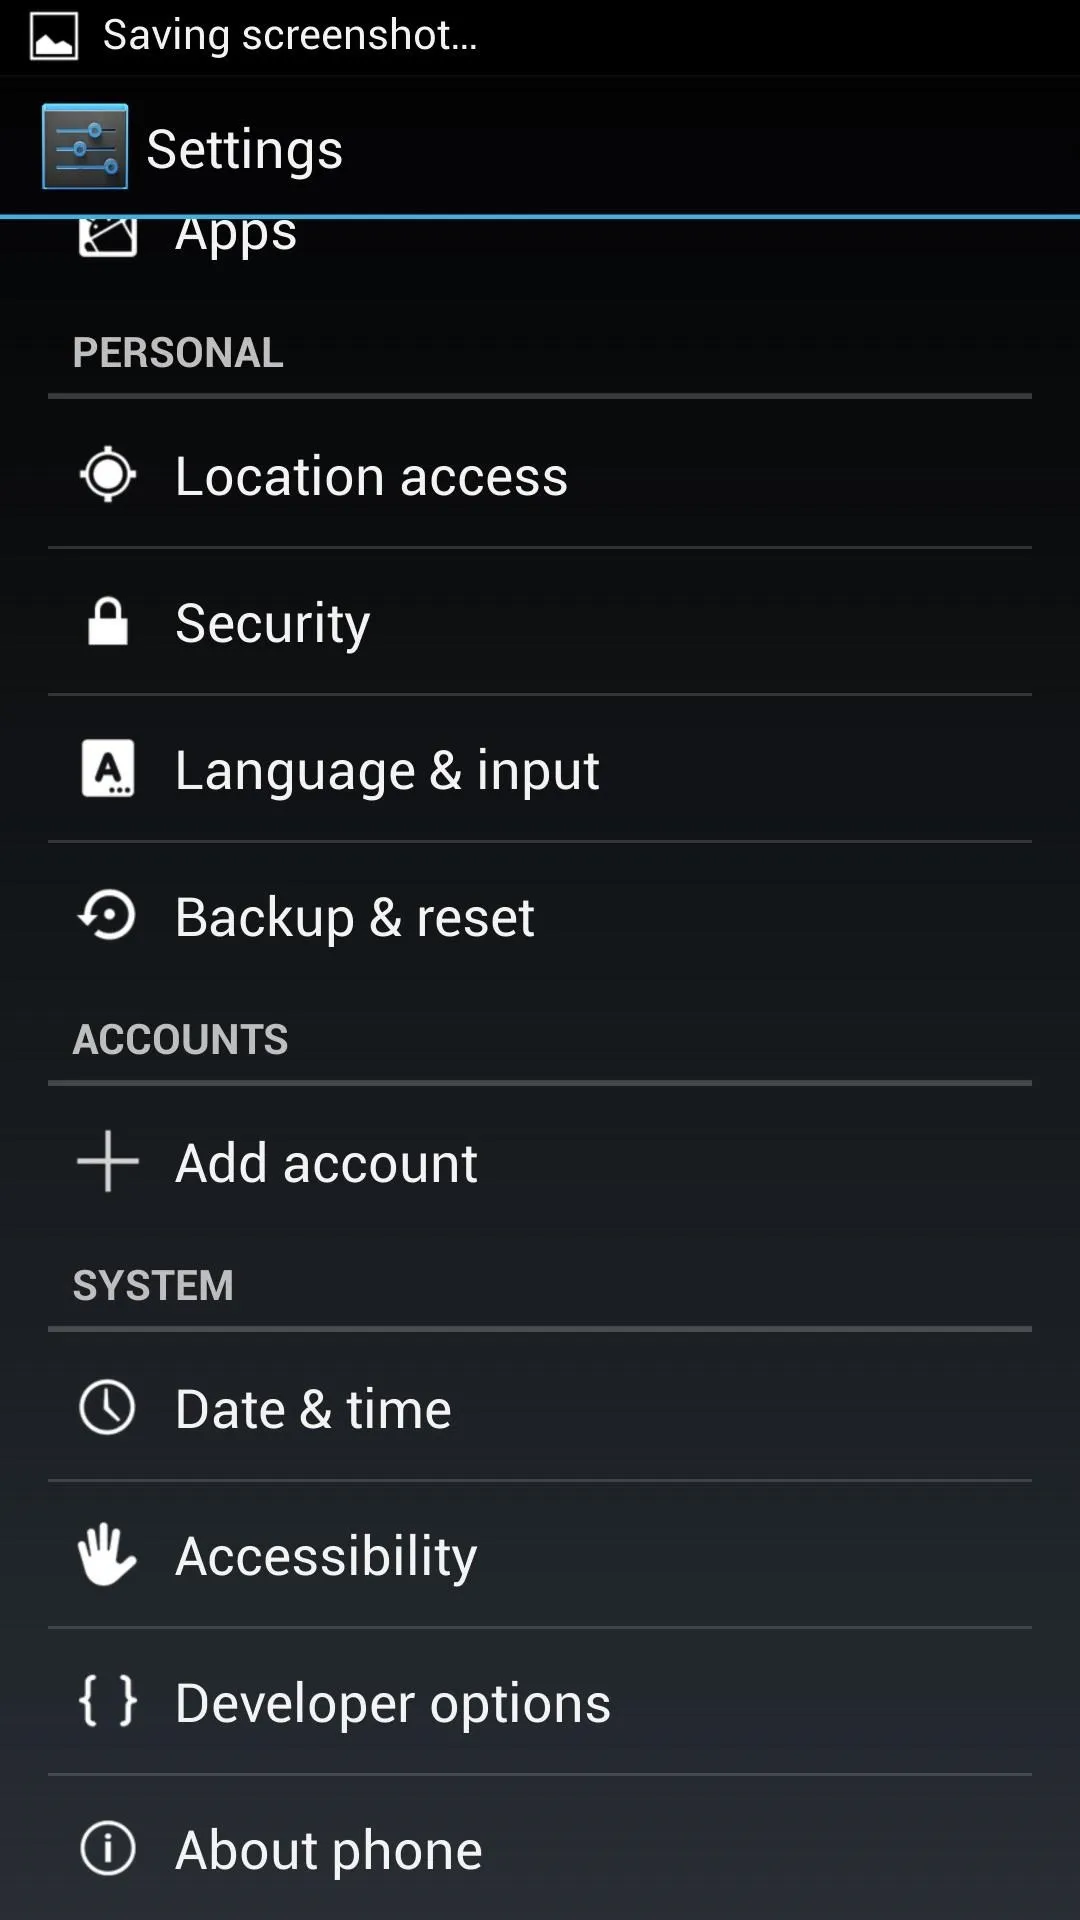
Now, we'll need to enable USB Debugging. But before that, you'll need to unhide the Developer Options by going to Settings, About phone, and tapping Build number seven times. You'll get a message saying that you are now a developer.
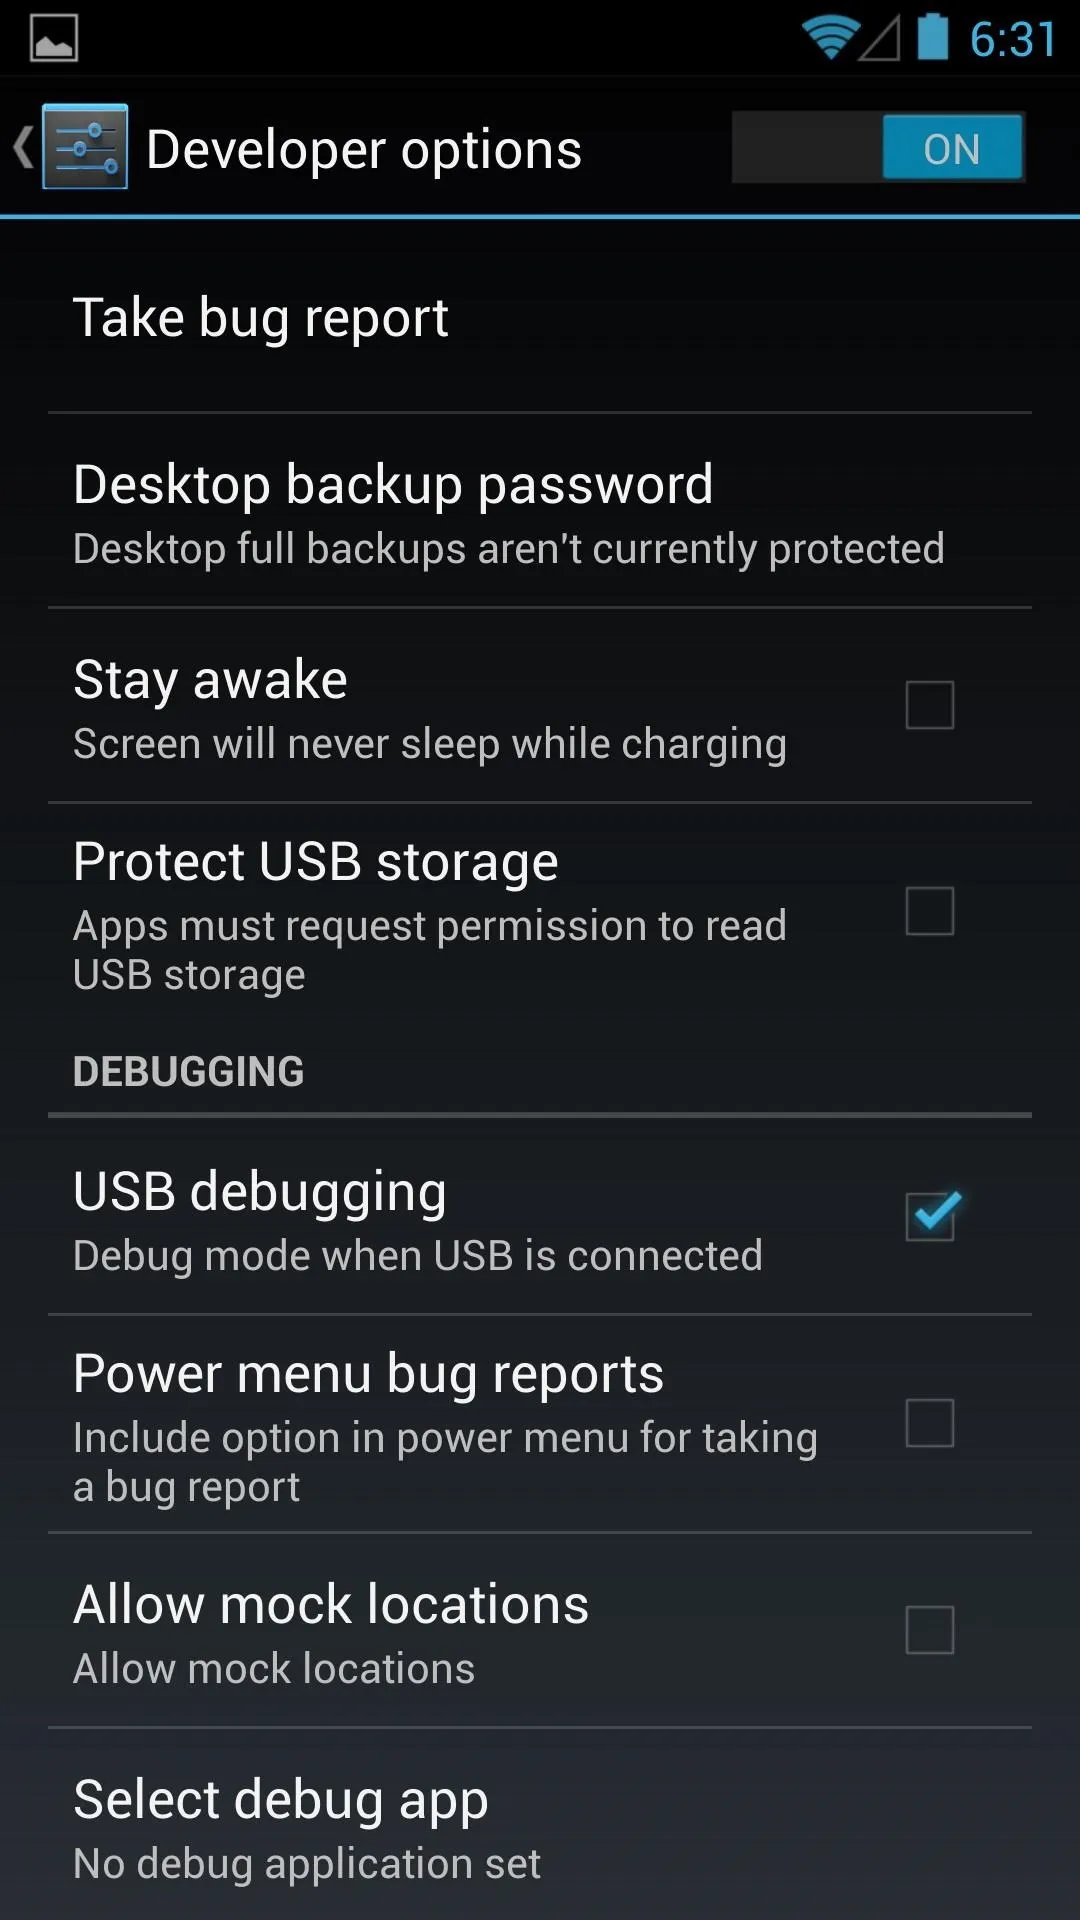
Finally, back in the Settings menu, select Developer Options and check the box next to USB Debugging to enable it. Tap Allow on the prompt to enable ADB access from a computer.


Download & Install TWRP
Reboot into your bootloader once more, either manually or with ADB. Download the latest Team Win Recovery Project from here.
In your command prompt, navigate to your download directory. To make things easier, I copied the recovery to the my SDK-tools directory and renamed it twrp.img. To install the recovery, run the command:
- fastboot flash recovery (filename)

Root Your Device
On your phone, go back to the bootloader menu by pressing Power (Bootloader should be selected). Then highlight Recovery and press Power again. In TWRP, tap Reboot, and then System. It'll ask you if you want to install root, so Swipe to install.
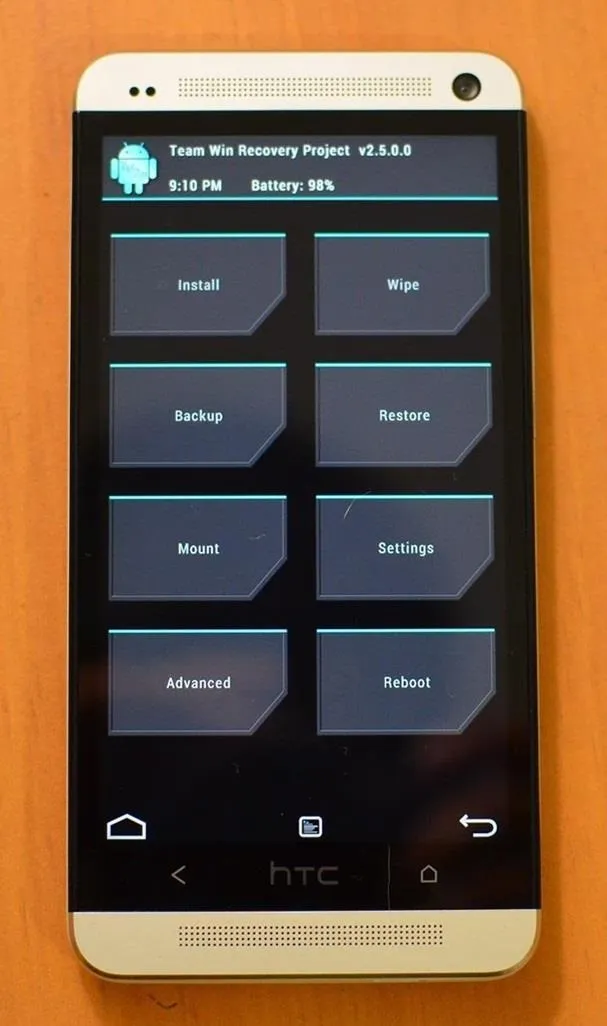
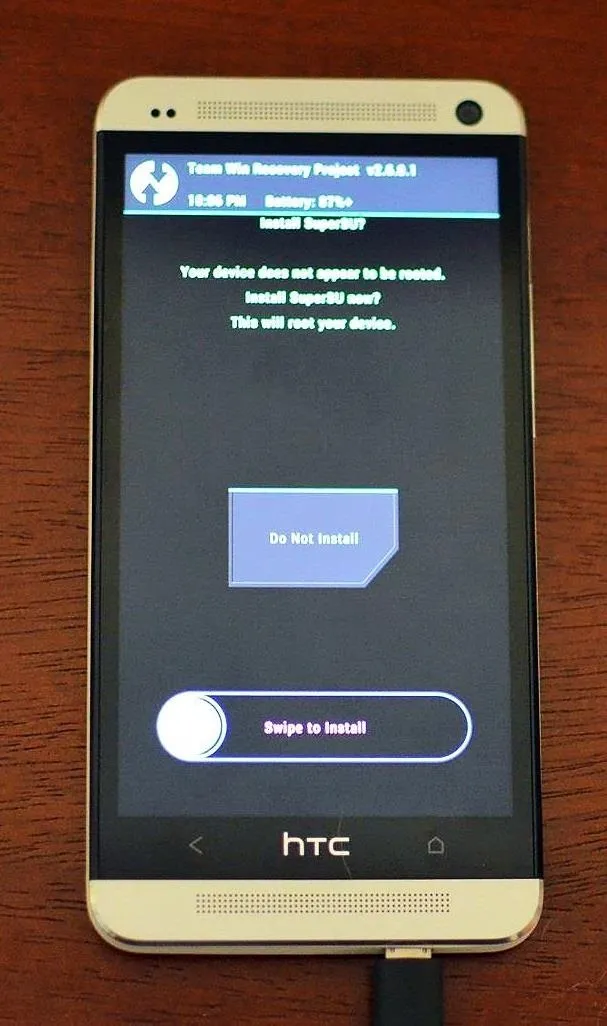


Once your reboot into the Android OS, follow the instructions in the SuperSU notification to complete the root process.
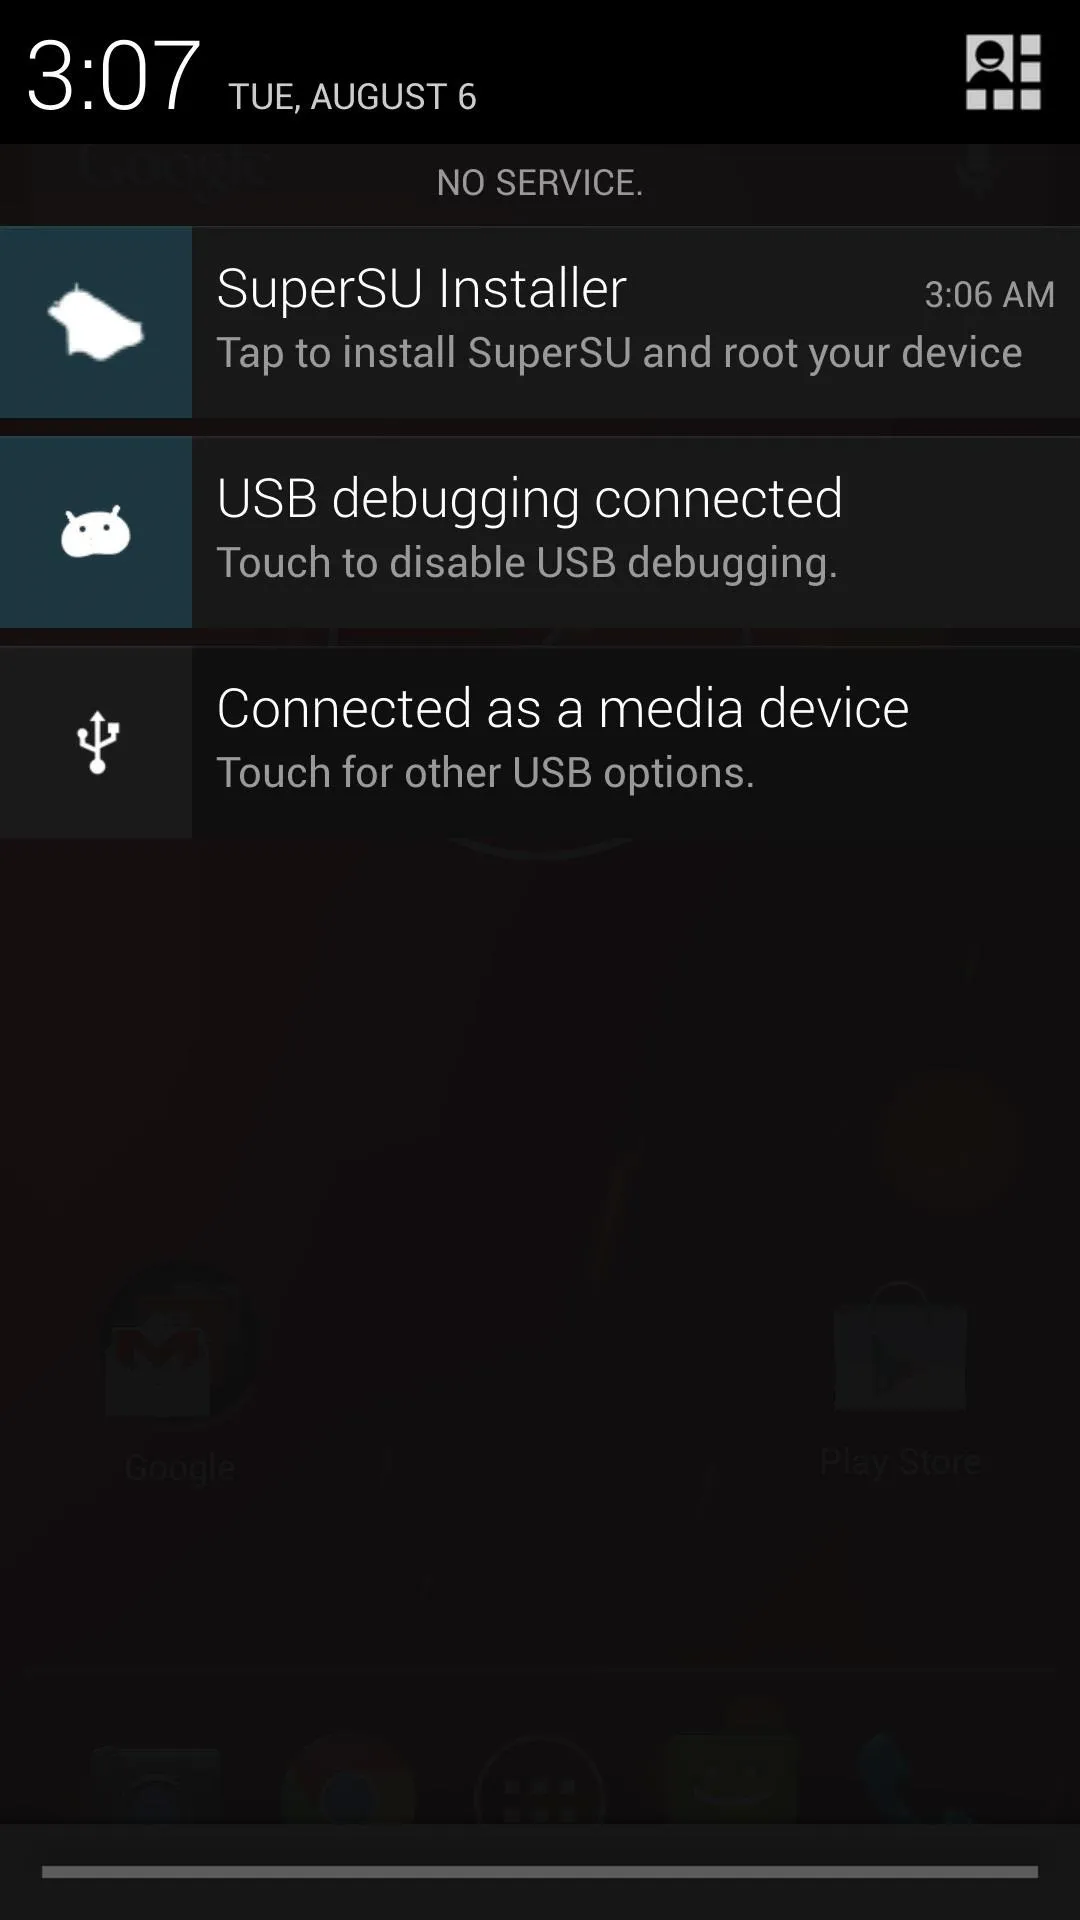
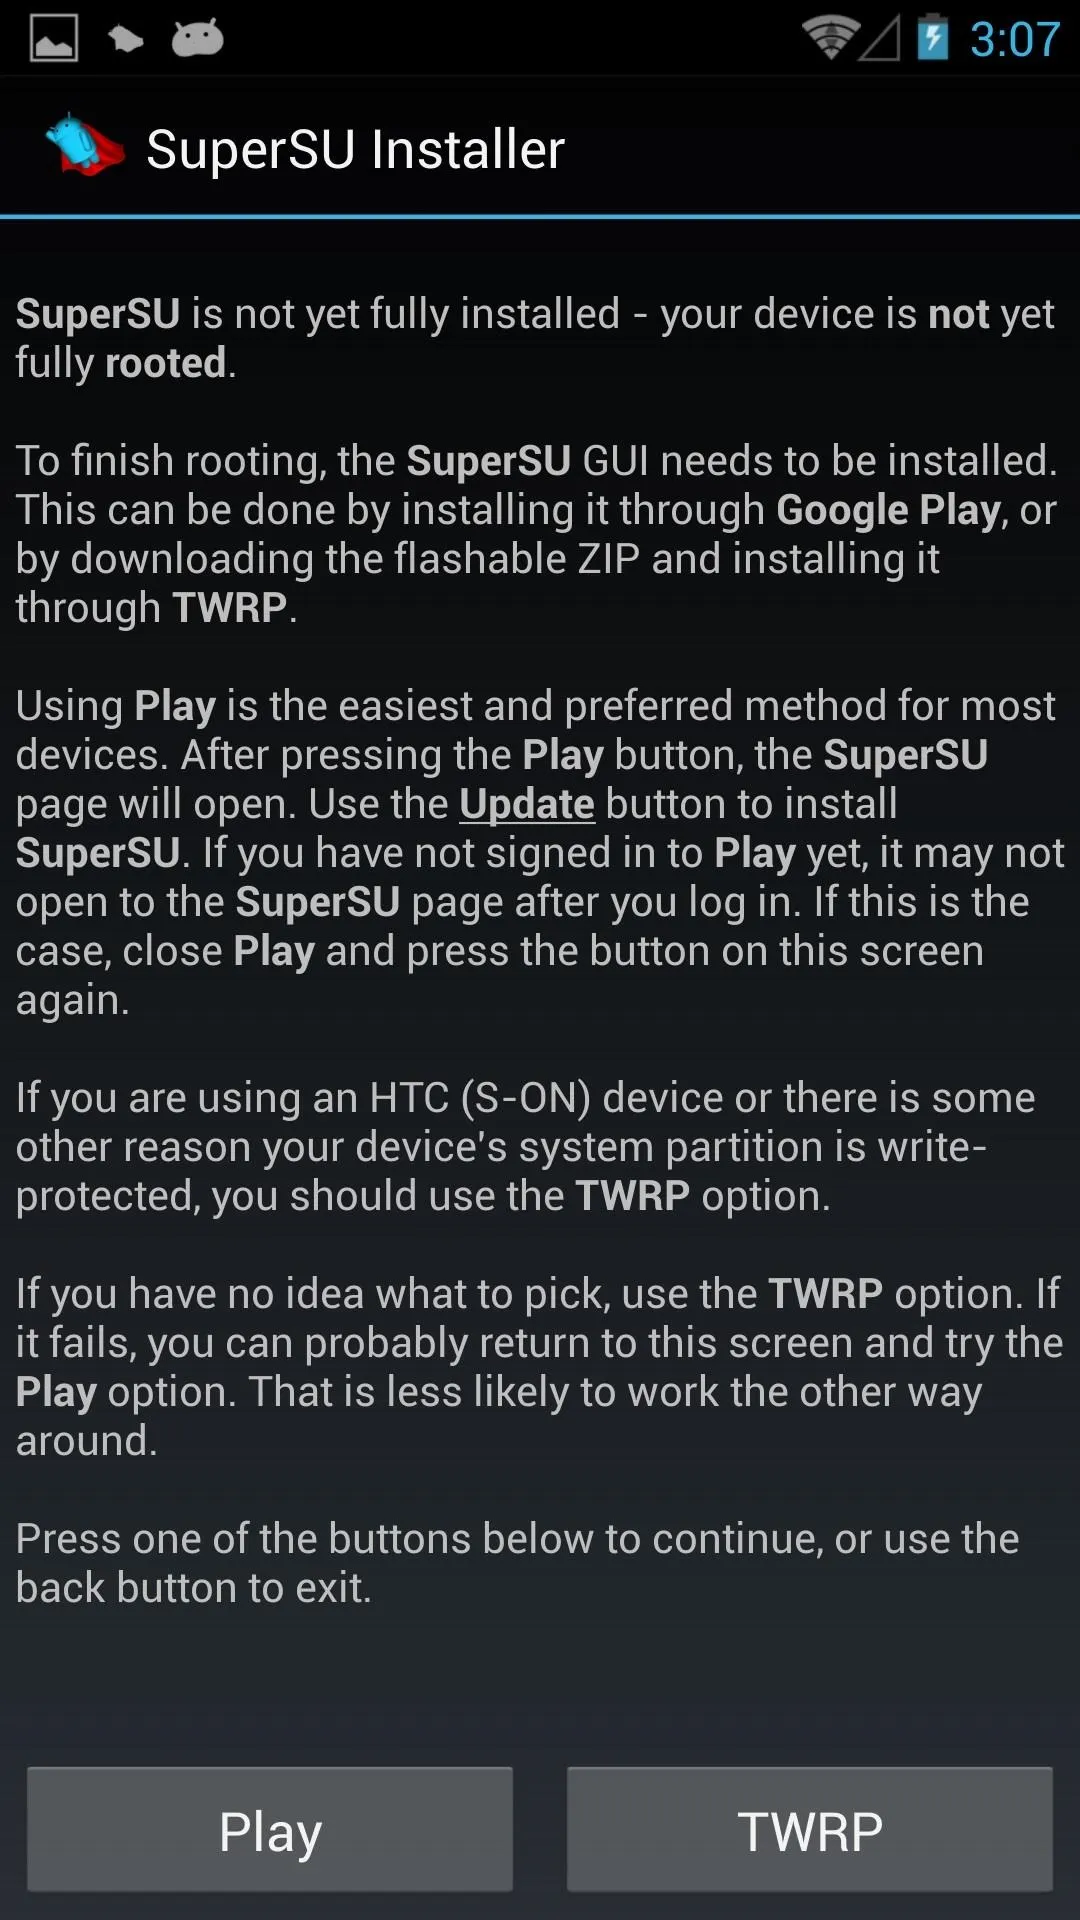


Enjoy Being Rooted
Whether you want to install a custom ROM or a complete RUU (like you would if you were reverting back to the original HTC One with Sense), you're ready to explore the modding world of the HTC One.








Comments
Be the first, drop a comment!