As with most OEMs, HTC would like you to think that you can do virtually anything with your new HTC One M8, but as a softModder, you know that isn't true. To actually unleash the full potential of that device, you need access to the whole system, not just the parts that HTC deems okay for you to mess with.
To truly reach your M8's full potential, you will first need to unlock your bootloader and root your device. By unlocking the bootloader, you grant your phone the ability to install custom recoveries, mods, and ROMs. With the custom recovery, you can root your device to gain administrator access, which allows you to modify the parts of the device's system that spell doom for some, but open doors for softModders.
Now, I've already shown how to unlock and root the HTC One M7, but I'm gearing this one specifically for the new M8 with Android 4.4 KitKat, so there's no confusion. These instructions will also work for the M7, though.
The Prerequisites
Before getting started, you need to get a few of the basic necessities out of the way first. Make sure you check off all of the following before moving on to the first step.
- Make sure your phone is at least 60% charged.
- Register for an account at HTCdev.
- Enable USB debugging in your phone's Developer options.
- Un-check "Fast boot" on your phone by going to Settings -> Battery Manager.
- Install ADB and Fastboot on your computer.
- Make sure to back up all of your app data using either ADB or HTC Sync, because you will be wiping your phone.
- Install the HTC One M8 drivers on your computer (if you have HTC Sync installed, then you already have them).
Unfortunately, Verizon thought it best to keep you from unlocking your bootloader, so you'd have to use a different method to gain root access to your device.
How to Unlock Your Bootloader
After you've met all of the prereqs above, it's time to unlock your bootloader. This must be done prior to rooting, as mentioned above.
Enter Fastboot Mode
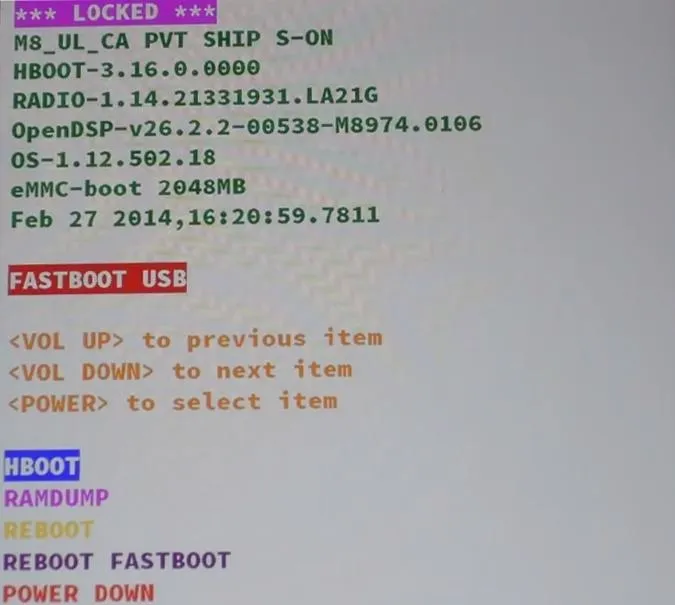
Place your device into fastboot mode by plugging in your HTC One to your computer, then powering it down by holding both the Power and Volume Down buttons until you see the screen below.
Locate Your Identifier Token
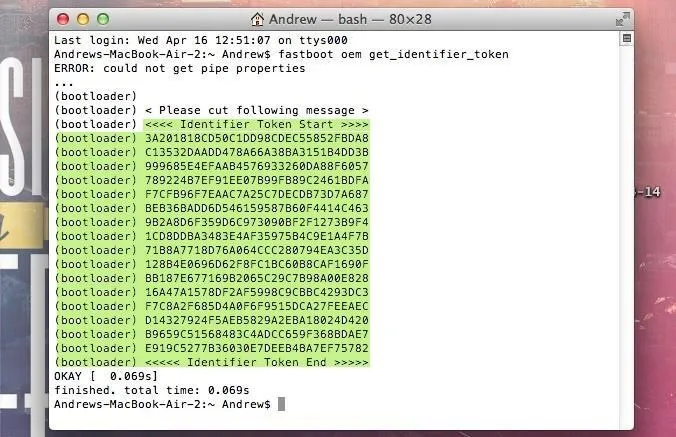
Once the screen above appears, open up a terminal (command prompt) on your computer. To get the right Unlock Code for your HTC One, you first need to get your device's specific Identifier Token, so type the following into your terminal window, followed by the Enter/Return key.
- fastboot oem get_identifier_token
Copy the Token
Now copy the code you get, but do not include the first (bootloader) portions.
Log into HTCdev
Go to HTCdev and log in to your account.
Get Your Code Emailed to You
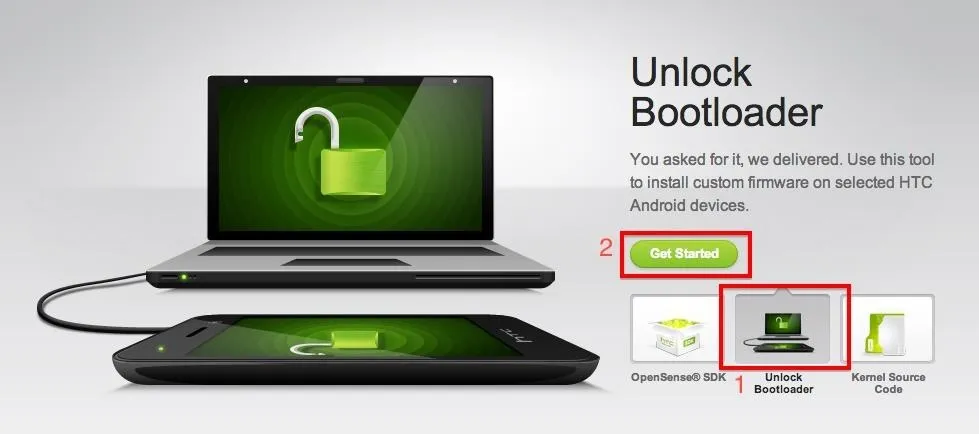
Select Unlock Bootloader and then Get Started.
From the drop-down menu, select HTC One (M8) (or just HTC One for the older M7 model, if that's what you're unlocking), then click on Begin Unlock Bootloader.
Agree to the terms and conditions and click Proceed to Unlock. On the next page, scroll all the way down and click on Proceed to Step 5.
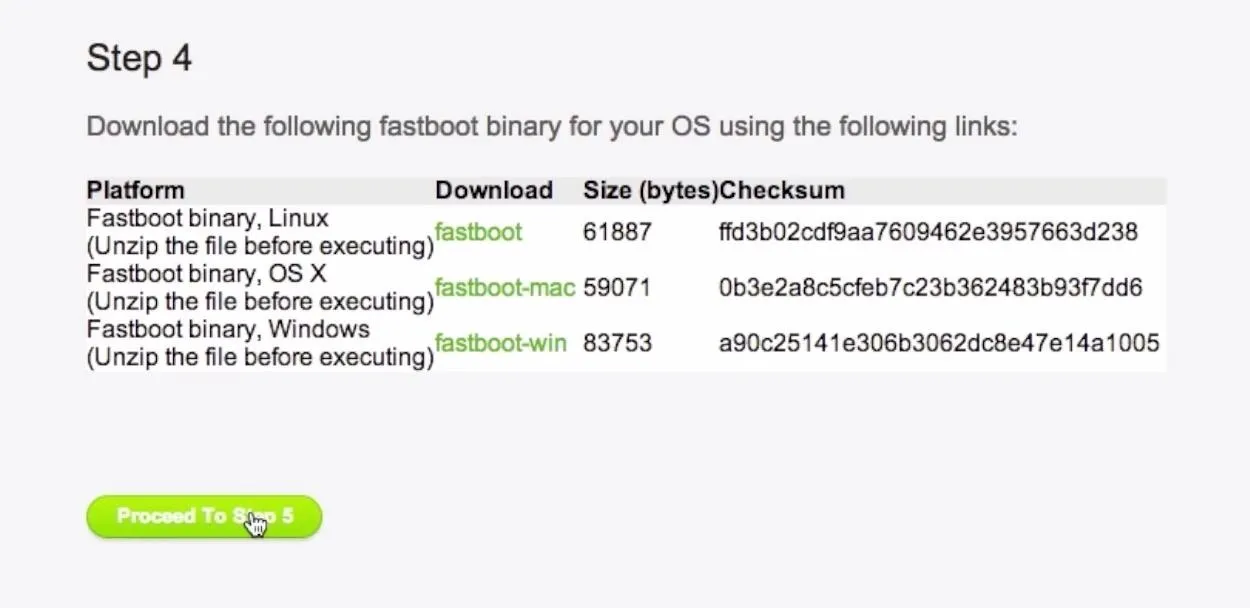
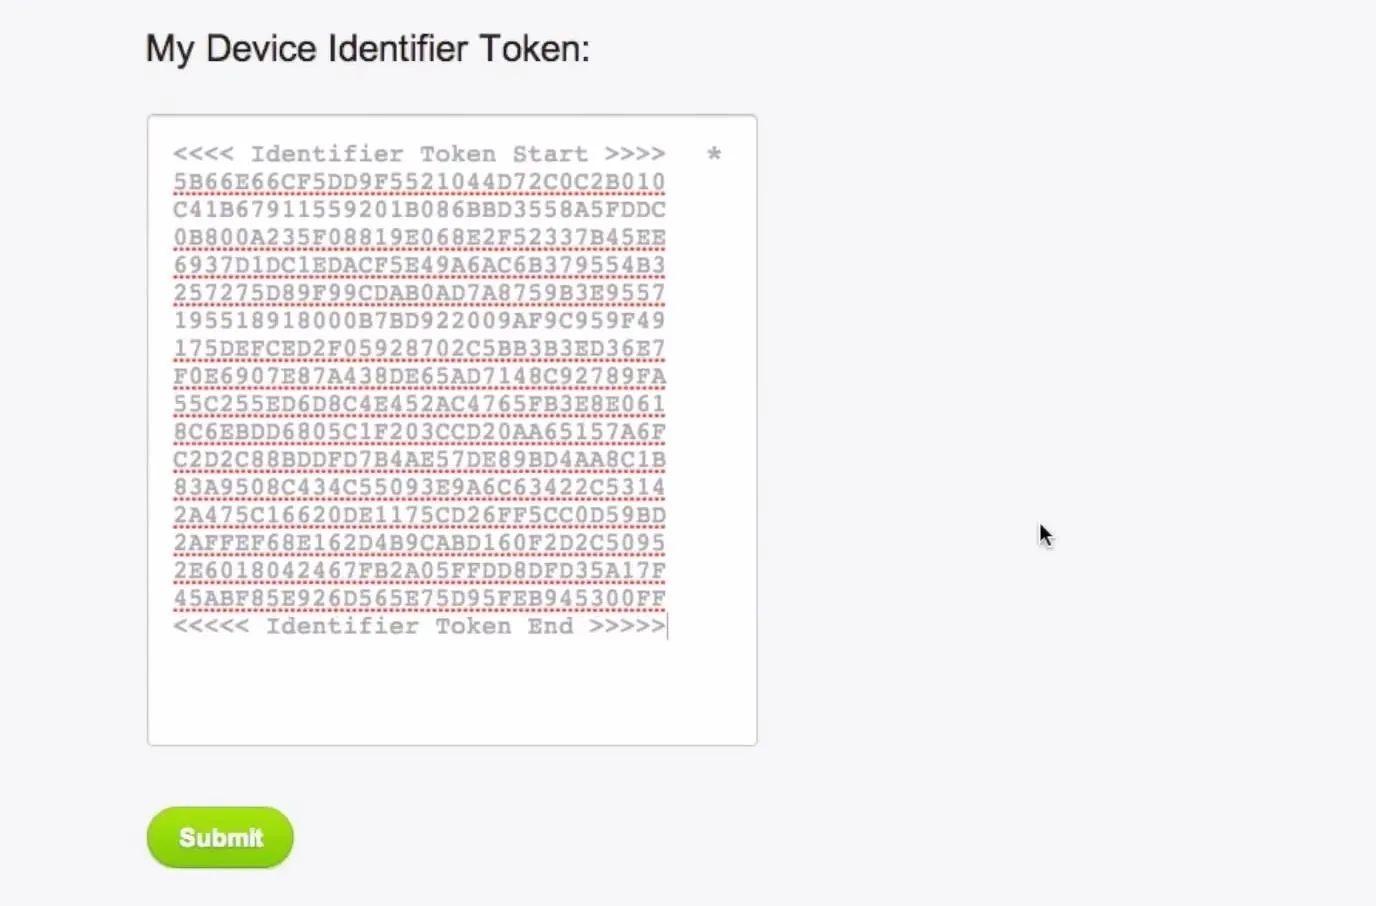
Now paste the identifier token you copied in Step 3 into its corresponding box near the bottom (called My Device Identifier Token) and click Submit.
Download the Unlock Code
The Unlock Code will be emailed to you, so once you receive the email, download the attachment and place it on your Desktop.
Initiate the Unlock Code
Back in the terminal prompt, type the following.
- fastboot flash unlocktoken Desktop/Unlock_code.bin
Change Desktop/Unlock_code.bin to the location of your code.

Confirm on Your HTC One
Your phone will now prompt you to unlock your bootloader, so using the Volume Up button, select Yes and confirm your unlock with the Power button.
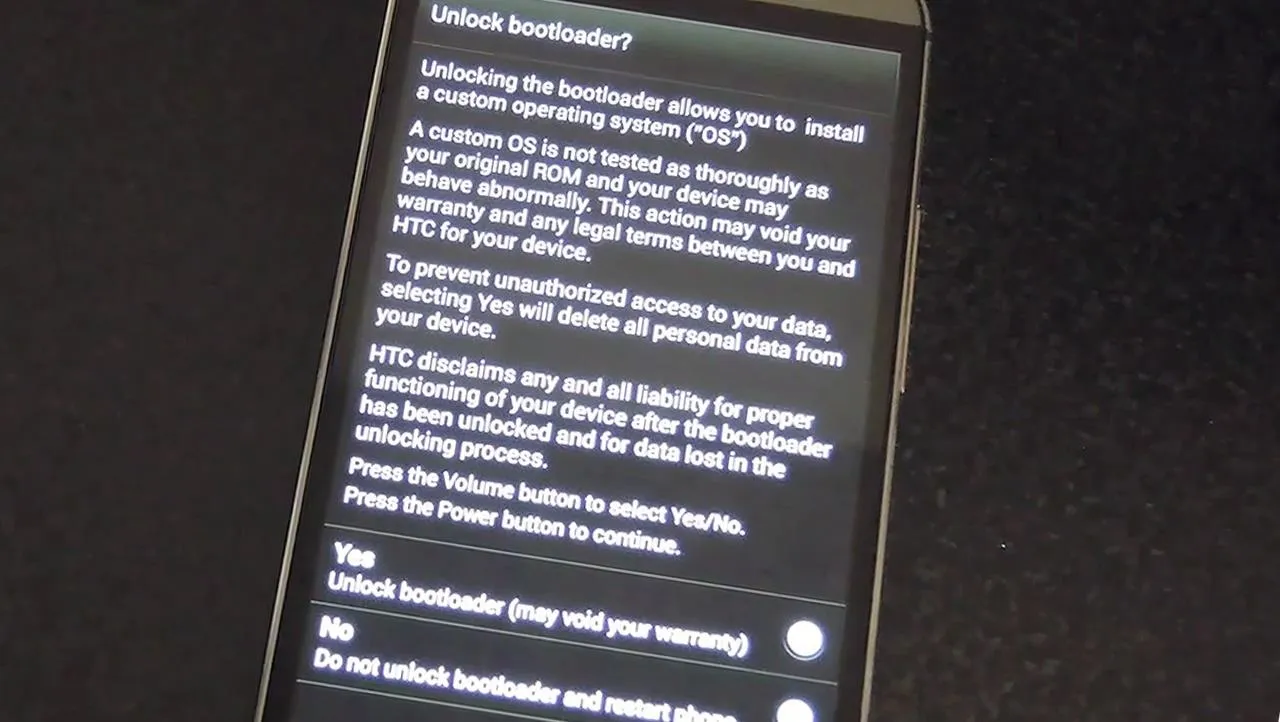
Your phone will now reboot and your bootloader will be unlocked!
After the reboot, you will need to set up your device again as if it were new. After getting set up, make sure to re-enable USB debugging and plug it back into your computer.
How to Install TWRP Recovery & SuperSU
Now it's time to instill root privileges on our device, and to do that, we have to install both a custom recovery (in this case, TWRP) and SuperSU.
Download SuperSU
Start by grabbing SuperSU from Chainfire directly on your phone, or download and place the file in your device's "Download" directory.
Enter Fastboot Mode
Just like we did back in Step 1, place your device into fastboot mode.
Download TWRP
Now download the appropriate TWRP recovery file for your particular wireless carrier and edition below.
- If you have an AT&T, T-Mobile, Developer, or International edition HTC One, go to this page to download the TWRP recovery.img file.
- If you have a Sprint HTC One, go to this page to download the TWRP recovery.img file.
Flash Your Recovery
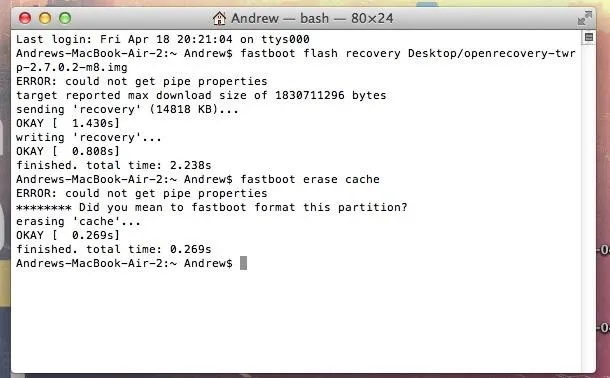
Now let's flash your downloaded TWRP file to your HTC One. Type one of the following commands into your terminal window, depending on which file you downloaded above.
For the AT&T, T-Mobile, Developer, or International editions, type:
- fastboot flash recovery Desktop/openrecovery-twrp-2.7.0.2-m8.img
For the Sprint edition, type:
- fastboot flash recovery Desktop/openrecovery-twrp-2.7.0.2-m8_whl.img
Erase the Cache
Once you get the Success message from ADB, type fastboot erase cache to prevent any boot loops.
Boot into Recovery
Back on your HTC One, highlight Bootloader (using your Volume keys) and hit the Power button to confirm. In bootloader mode, select Recovery and hit the Power button again to boot into recovery mode. Your device will now reboot into TWRP.
Install SuperSU in Recovery & Reboot
Tap the Install option and select the SuperSU .zip you downloaded earlier, then swipe along the bottom bar to install.
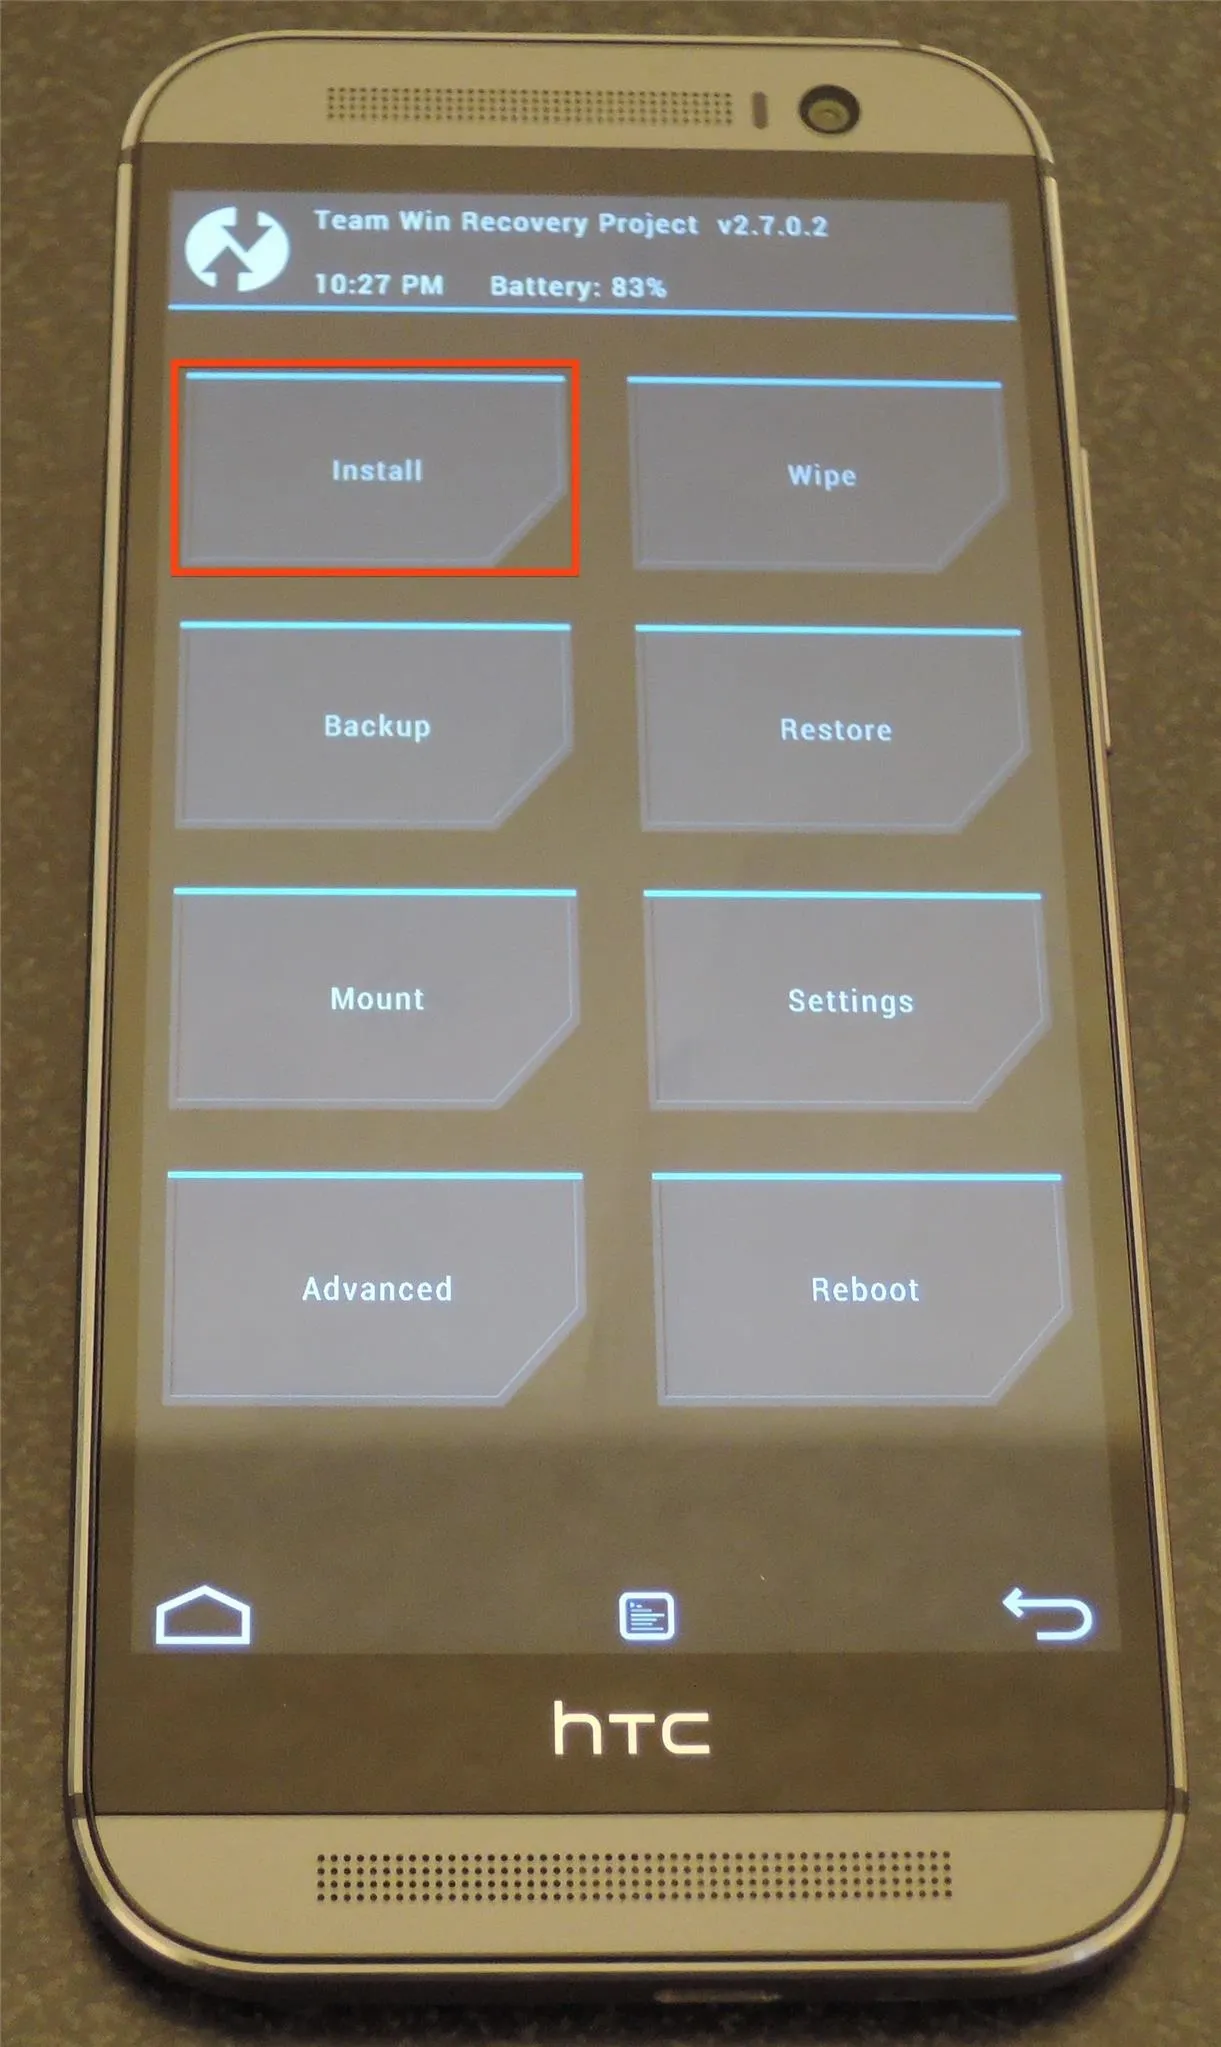
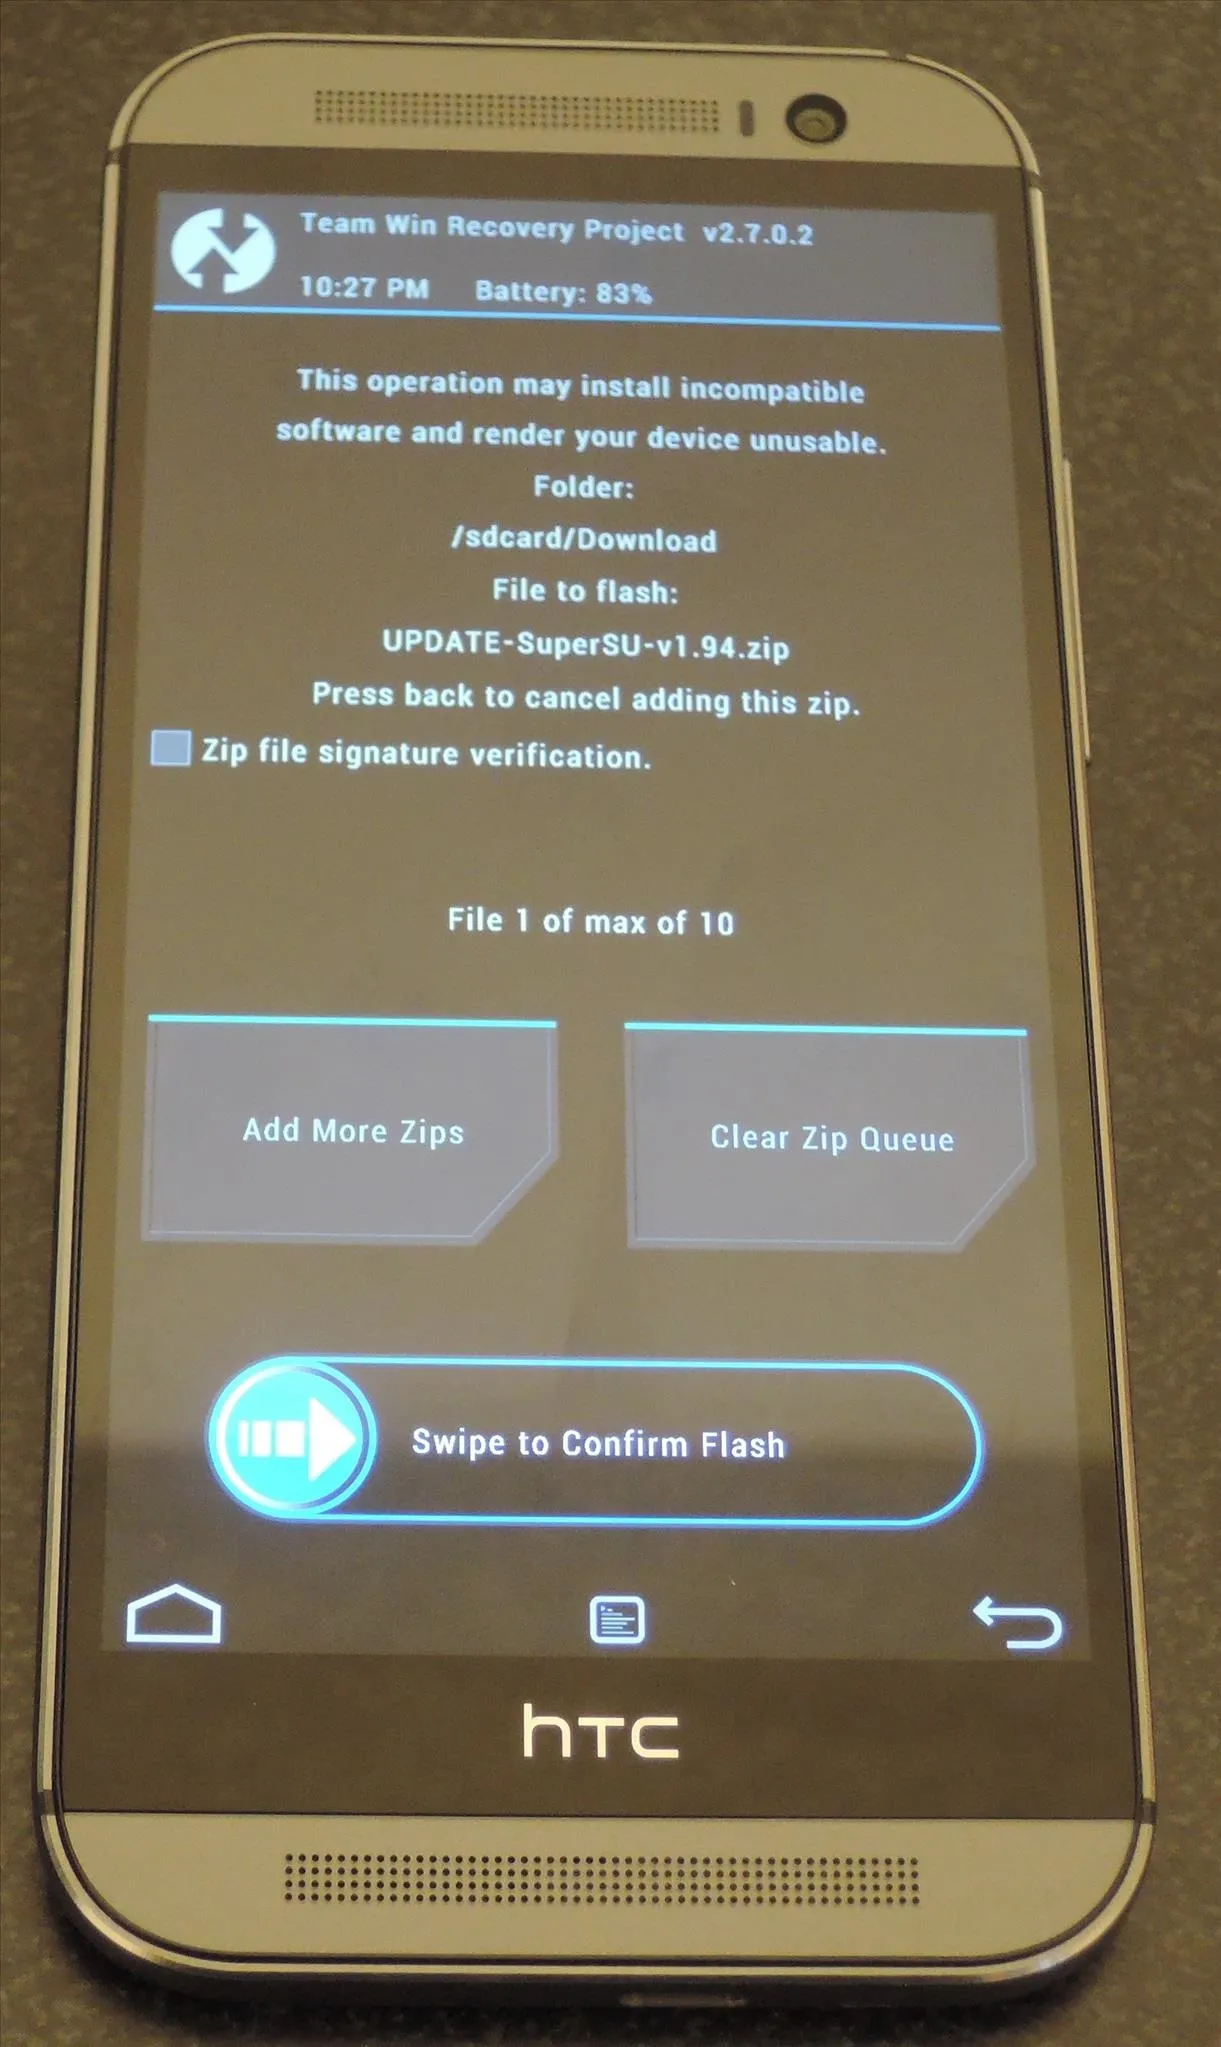


After the install finishes, go ahead and hit Reboot System.
Congratulations, you are now officially rooted!
Now That You're Rooted, Where to Next?
Once your device reboots, you will have a new SuperSU icon in your app drawer and the ability to grant apps root access to your device. This will come in handy when using apps like Xposed Installer.
You will also be able to restore your data the same way you backed it up (if you used the ADB method), so re-enable USB debugging, if you hadn't done so above, and get the restore process started.







Comments
Be the first, drop a comment!