Once you unlock your bootloader and root, you're left with one more hurdle to overcome, and that's getting S-Off.
By default, HTC has included security measures into the HTC One's bootloader, which prevents you from installing custom firmwares or other tweaks. By obtaining S-Off, you can completely ignore those rules and do basically whatever you want with your device.
If you're looking for gaining S-Off on your older HTC One M7, check out my guide on gaining S-Off on the HTC One M7. Though the process is somewhat the same, you will need a different ROM/kernel than the M8 one we're using here.
Before Getting Started: Things You Need to Have
There are a few basics you need to get out of the way before you can start this process:
- This method will only work for a device that already has an unlocked bootloader with a custom recovery, so be sure that you have that before going forward.
- Uninstall HTC Sync. The program is great way to get the HTC One M8 drivers installed, which you will need for this process, but it will interfere with the tool we will be using to S-Off your M8.
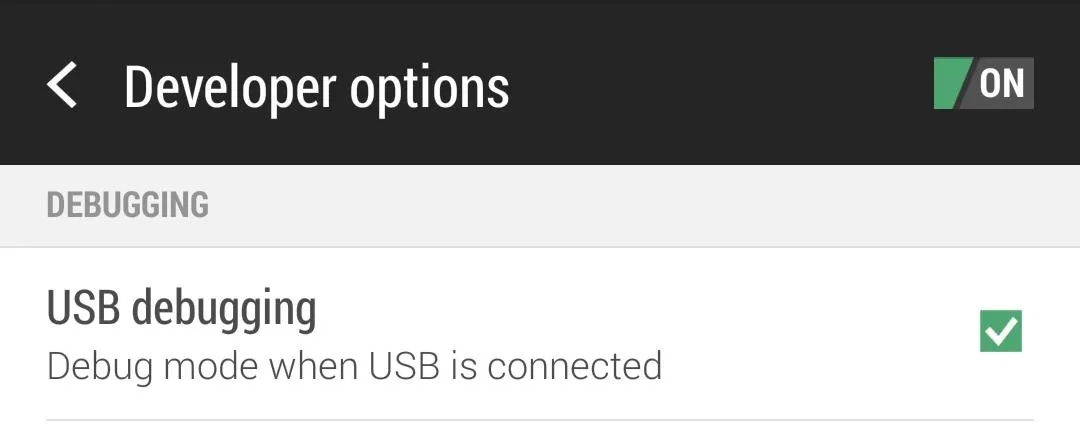
- Enable USB debugging.
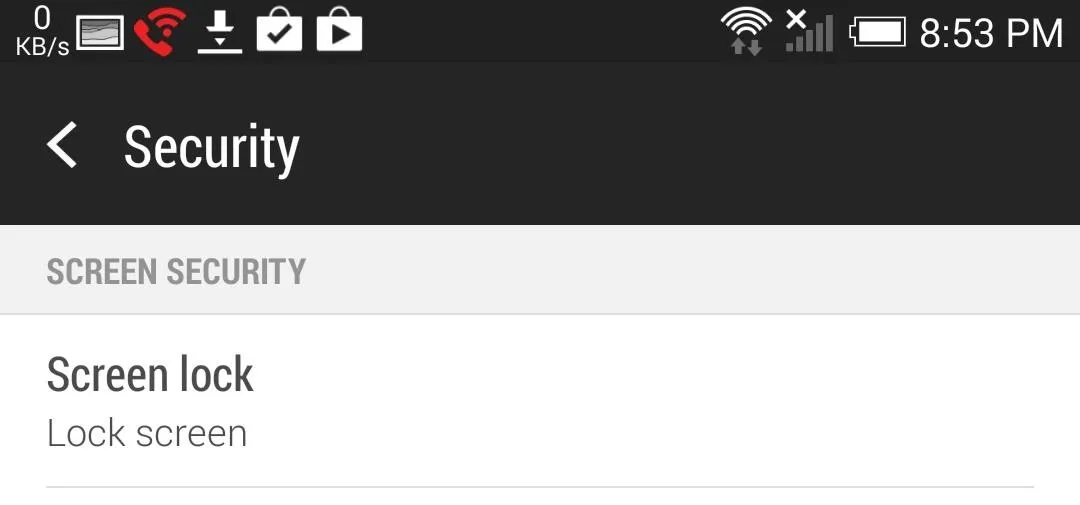
- Turn off all security settings from Settings -> Security.
- Disable Fast boot mode from Settings -> Power/Battery Manager.

- You'll also want to make sure that you are using a USB 2.0 (not USB 3.0) port for this for compatibility reasons.
- Backing up your data is also necessary, just in case anything goes wrong.
Preparing Your Framework & Kernel (Optional)
This process works best with a Sense-based ROM with an insecure kernel, and you can flash InsertCoin in order to have both of those bases covered.
This section (Steps 1 through 6) will show you how to to get InsertCoin ready on your HTC One, but if you're already running a kernel with an insecure kernel, you can skip this section and proceed directly to the Preparing Your Device & Downloading Firewater section below.
Download InsertCoin ROM to Your Device
We will be flashing the InsertCoin ROM so that we have a Sense framework and kernel that fits all the needs of the S-Off tool we are going to use. The InsertCoin ROM can be downloaded directly from the InsertCoin Team's website onto your device.

Enter Recovery Mode
With the ROM downloaded, place your device into Recovery mode by holding the Power and Volume Down buttons at the same time, which will take you to the following Bootloader screen:
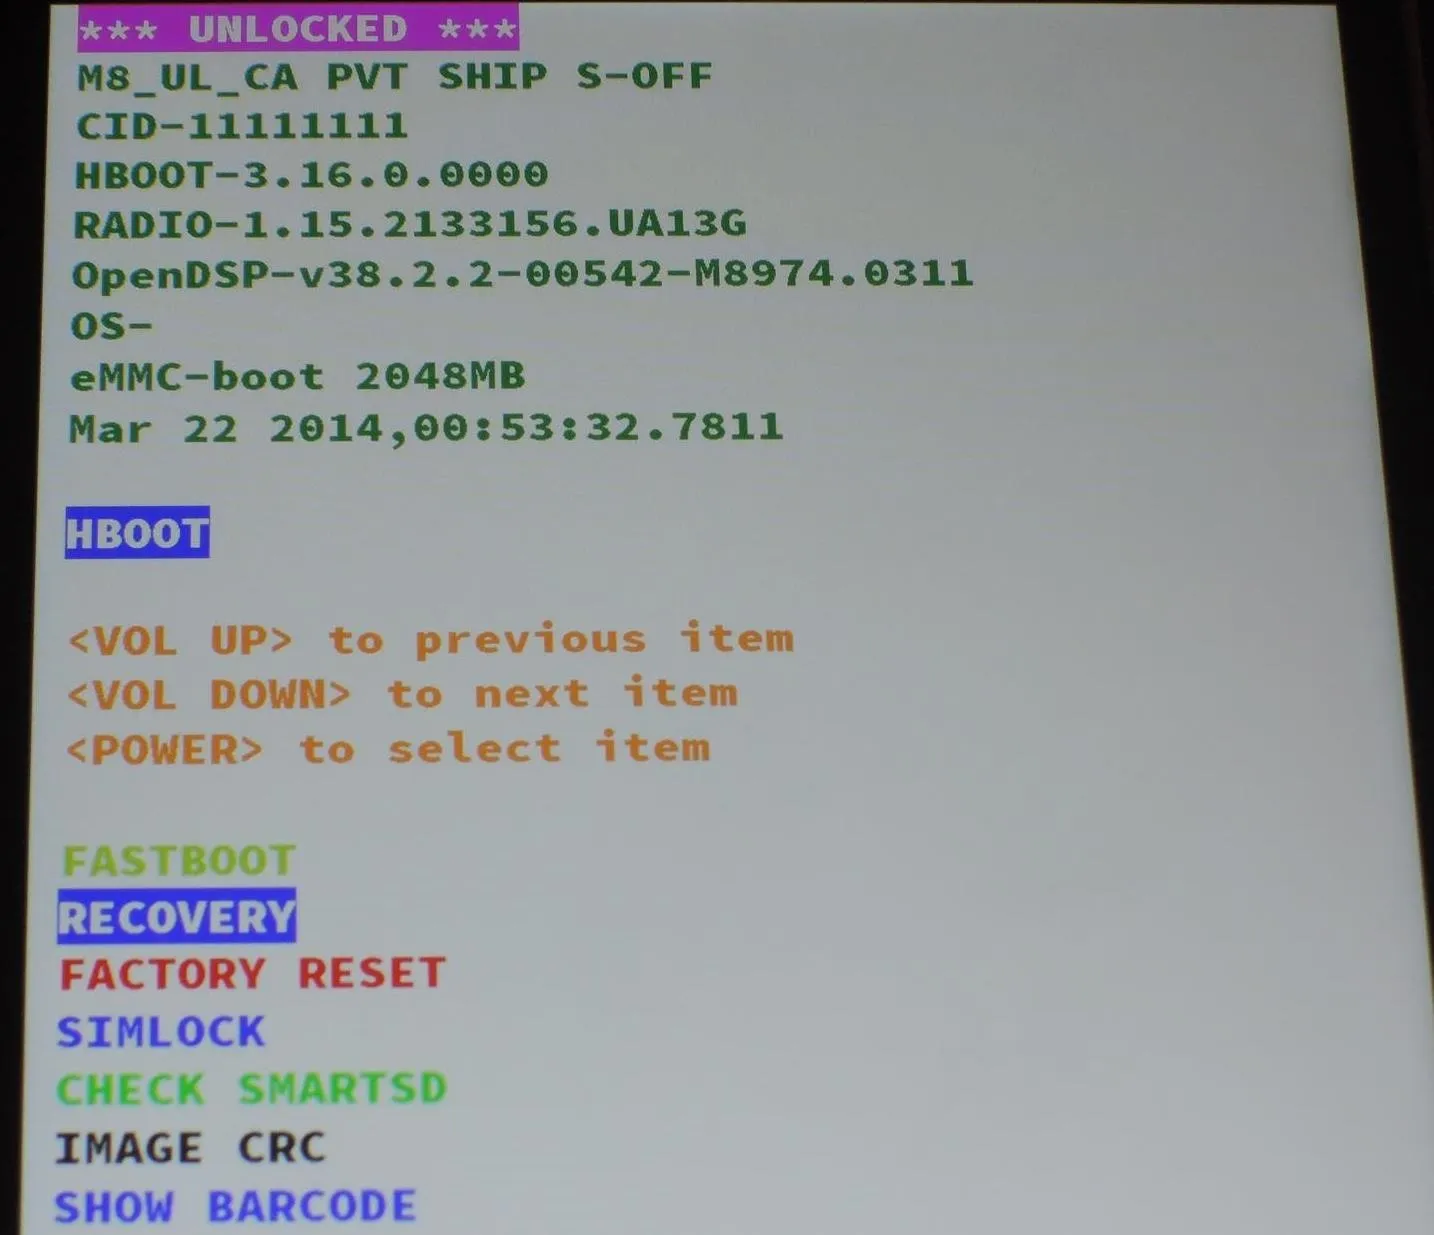
Once in Bootloader mode, use the Volume Down key to highlight Recovery and hit the Power button to boot into TWRP.
Create a Backup
Before going any further, you should make sure to have a backup of your existing setup since we'll be performing a full data wipe in the next step.
You can do this directly from TWRP using the Backup option. After going through the S-Off process, you can restore this backup to get all your apps, messages, and settings back as they were before.
Wipe Data
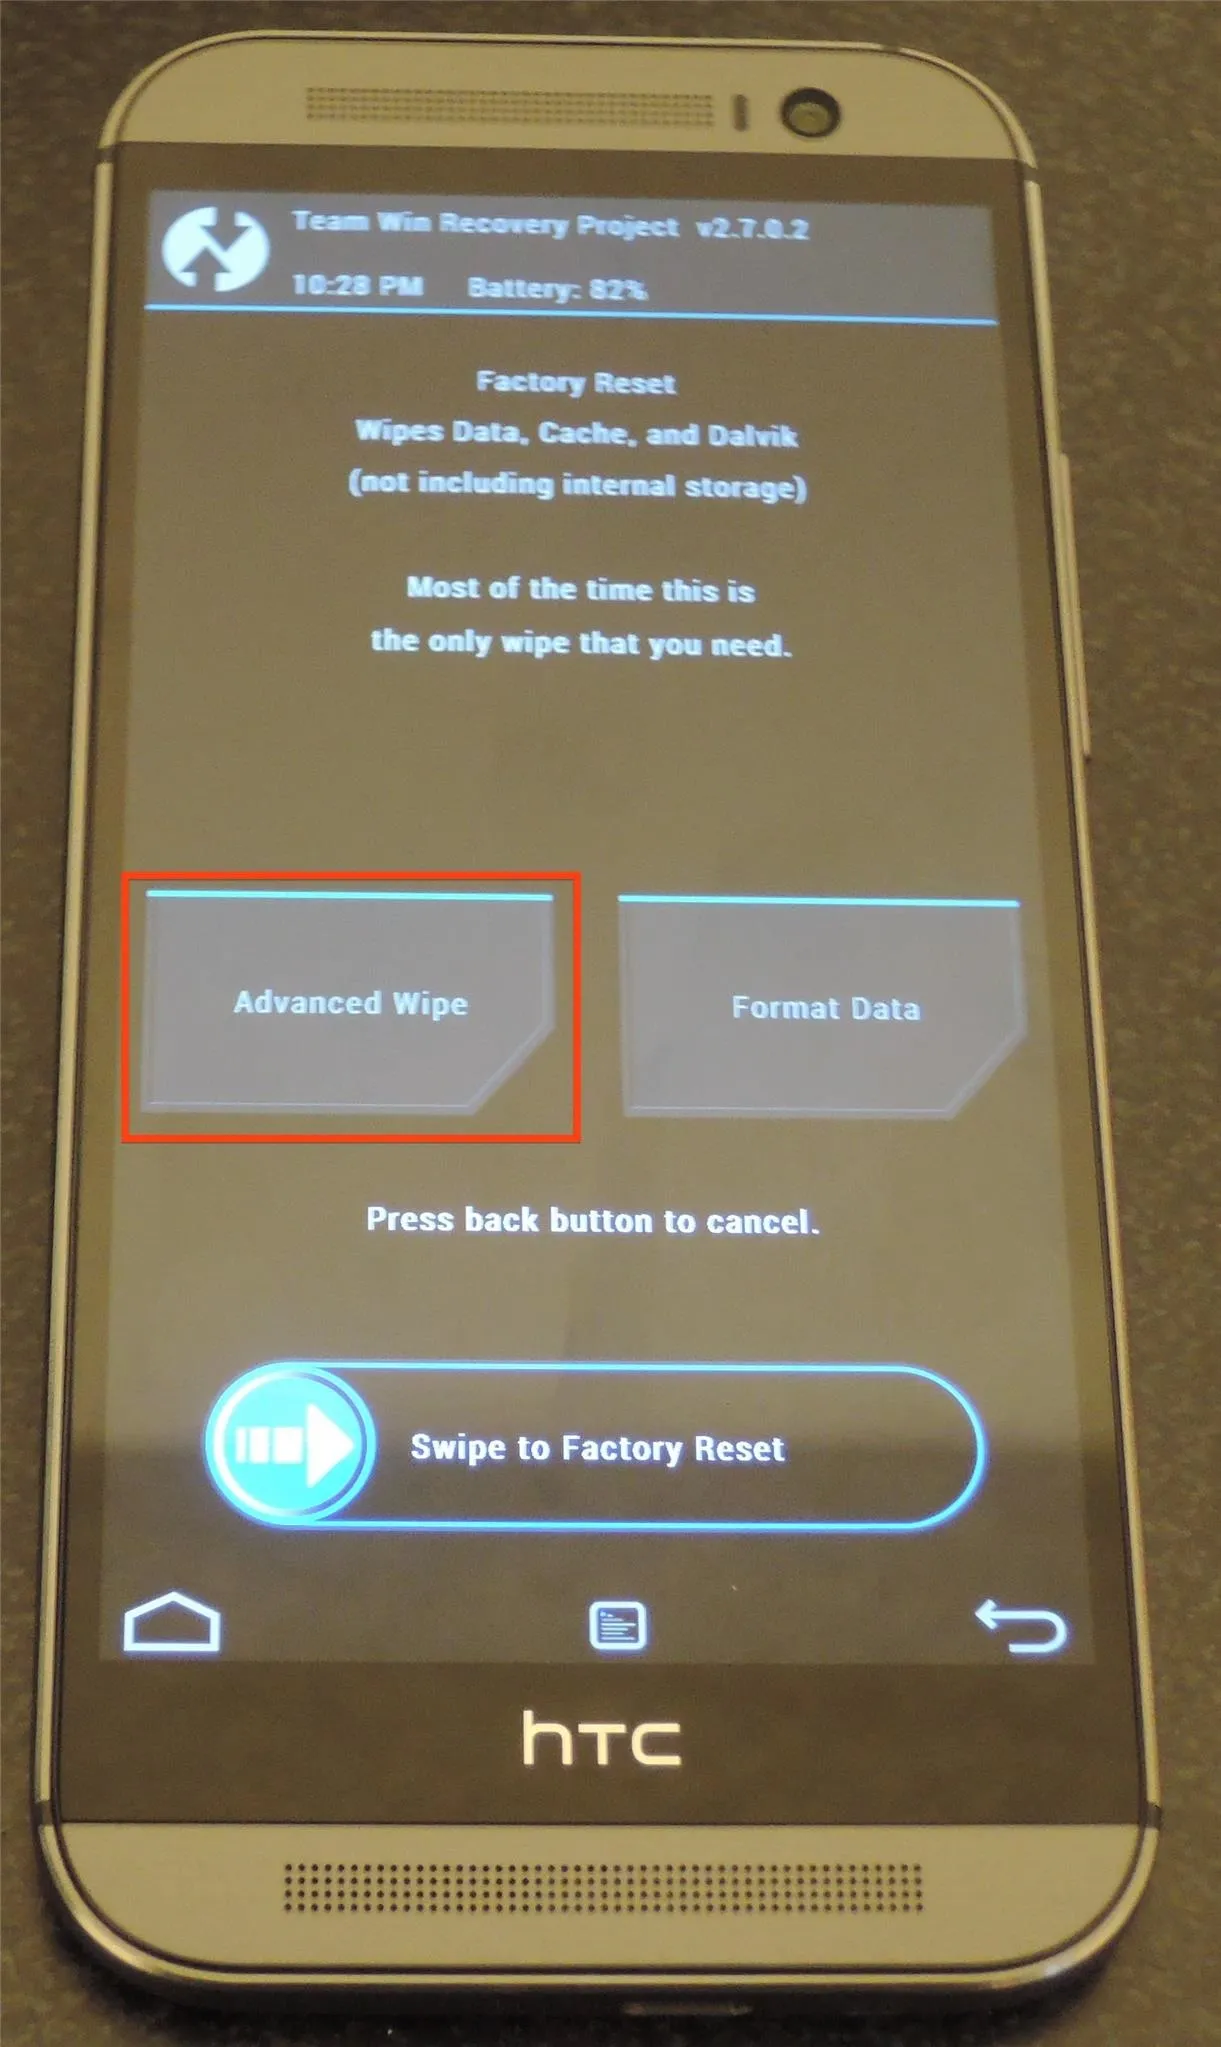
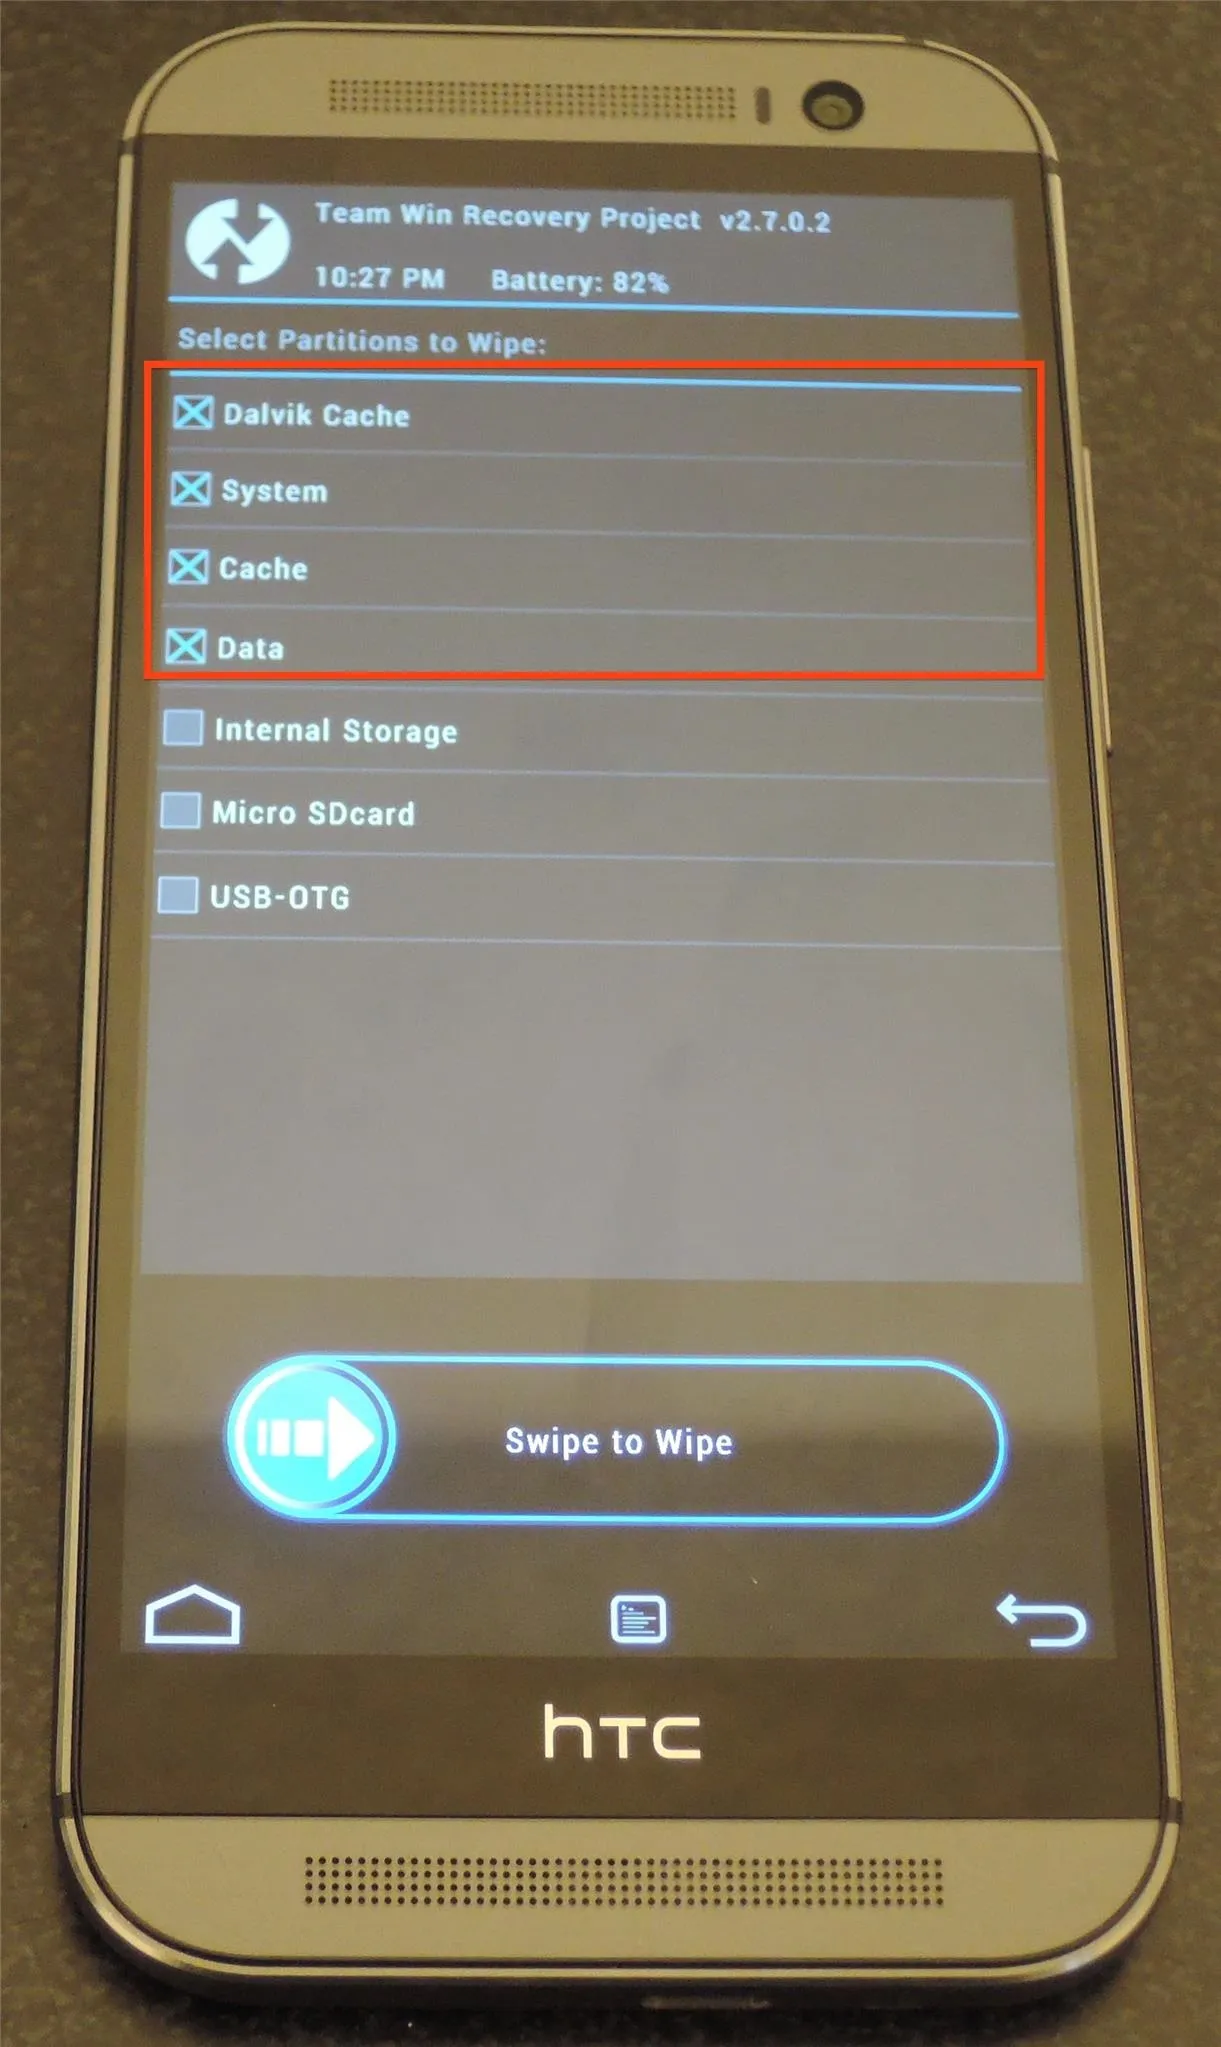
From the main TWRP menu, select Wipe, then Advanced Wipe and check the Dalvik Cache, Cache, Data, and System boxes, then Swipe To Wipe.


Flash InsertCoin ROM
Now tap the Home button to get back to the main TWRP menu and tap the Install option. Select the ROM you downloaded, then Swipe to Confirm Flash.
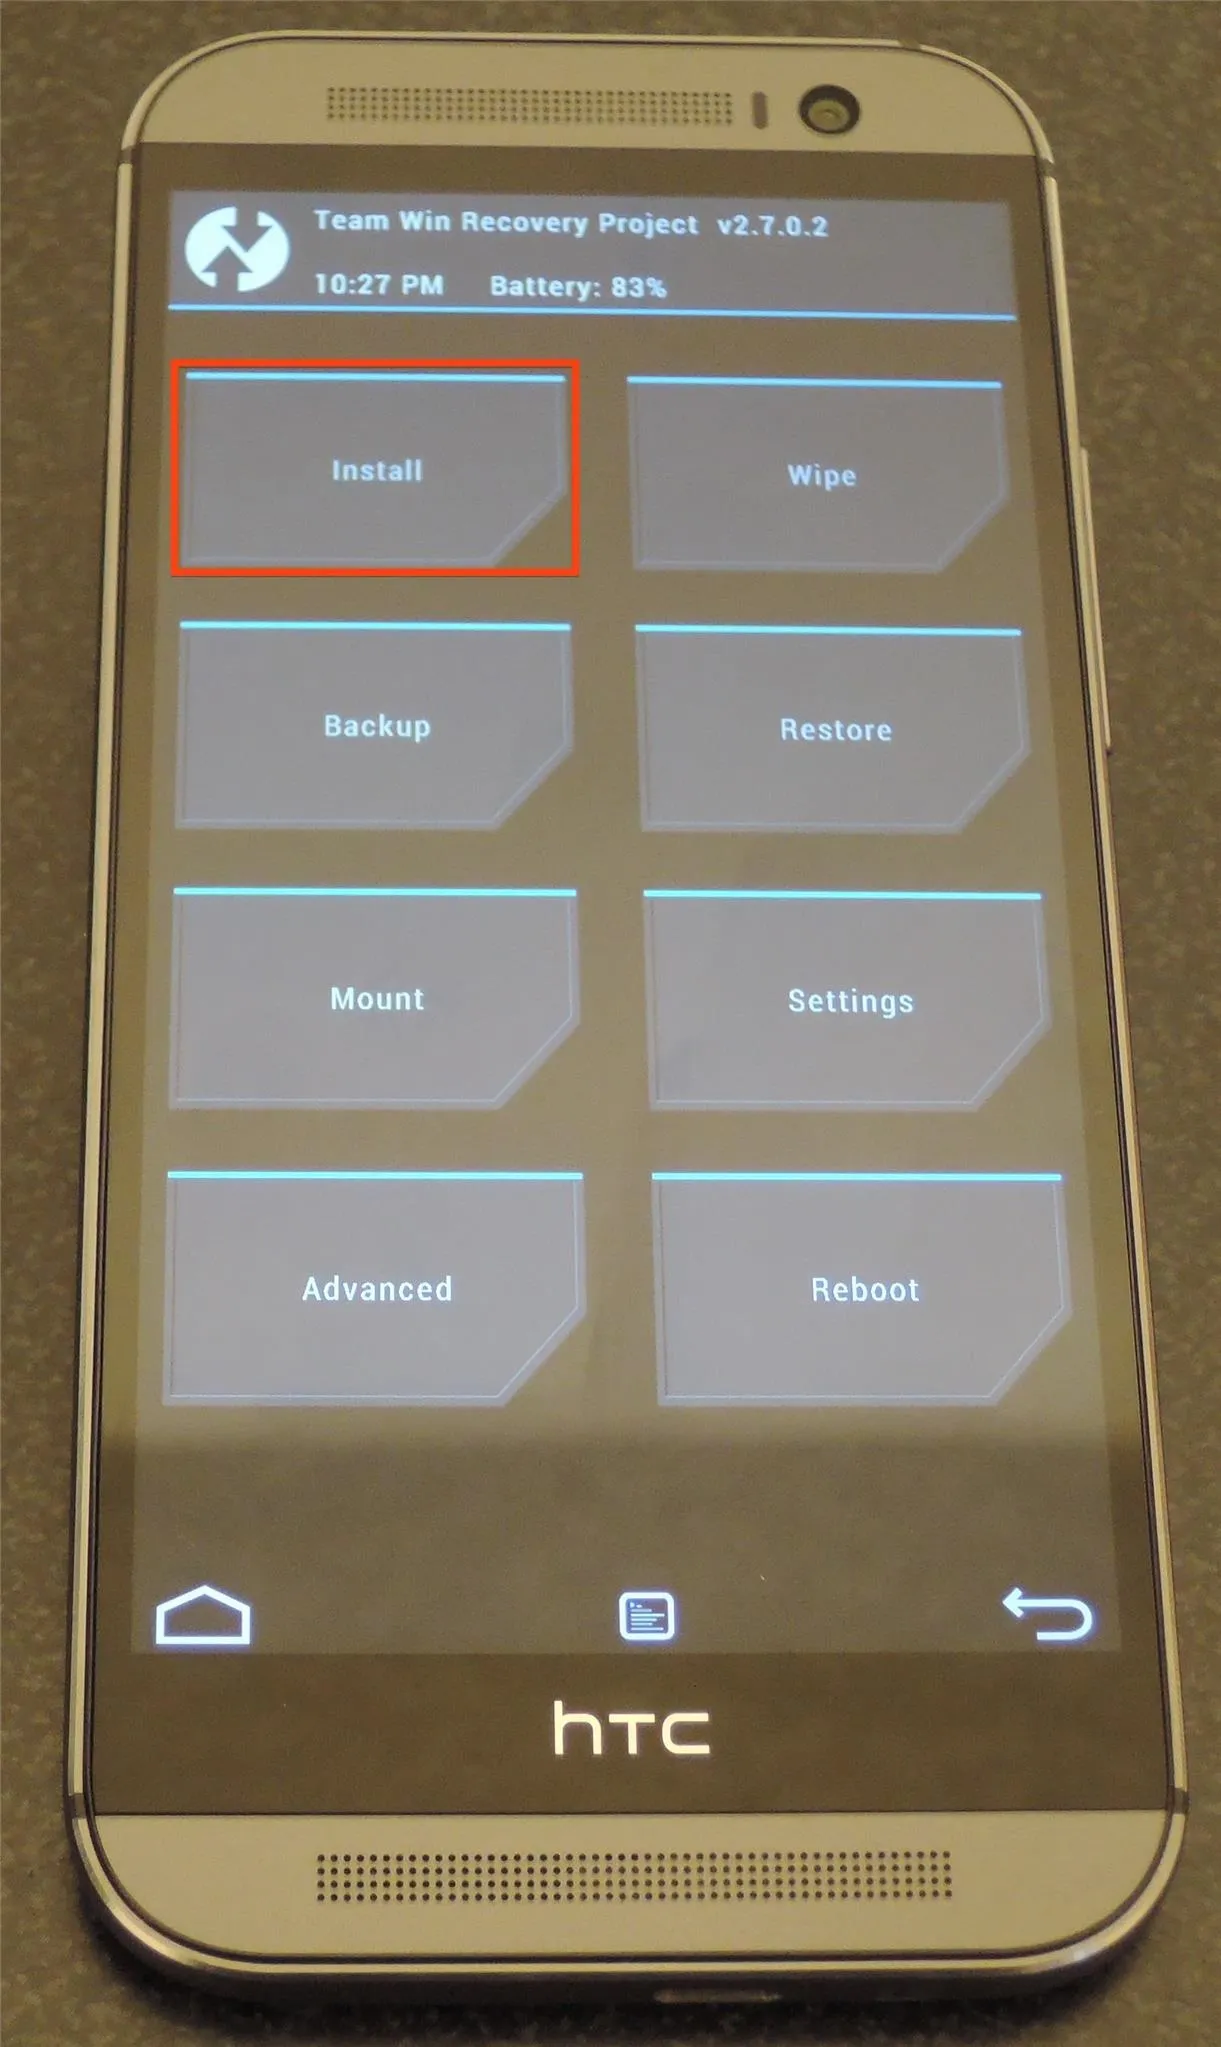
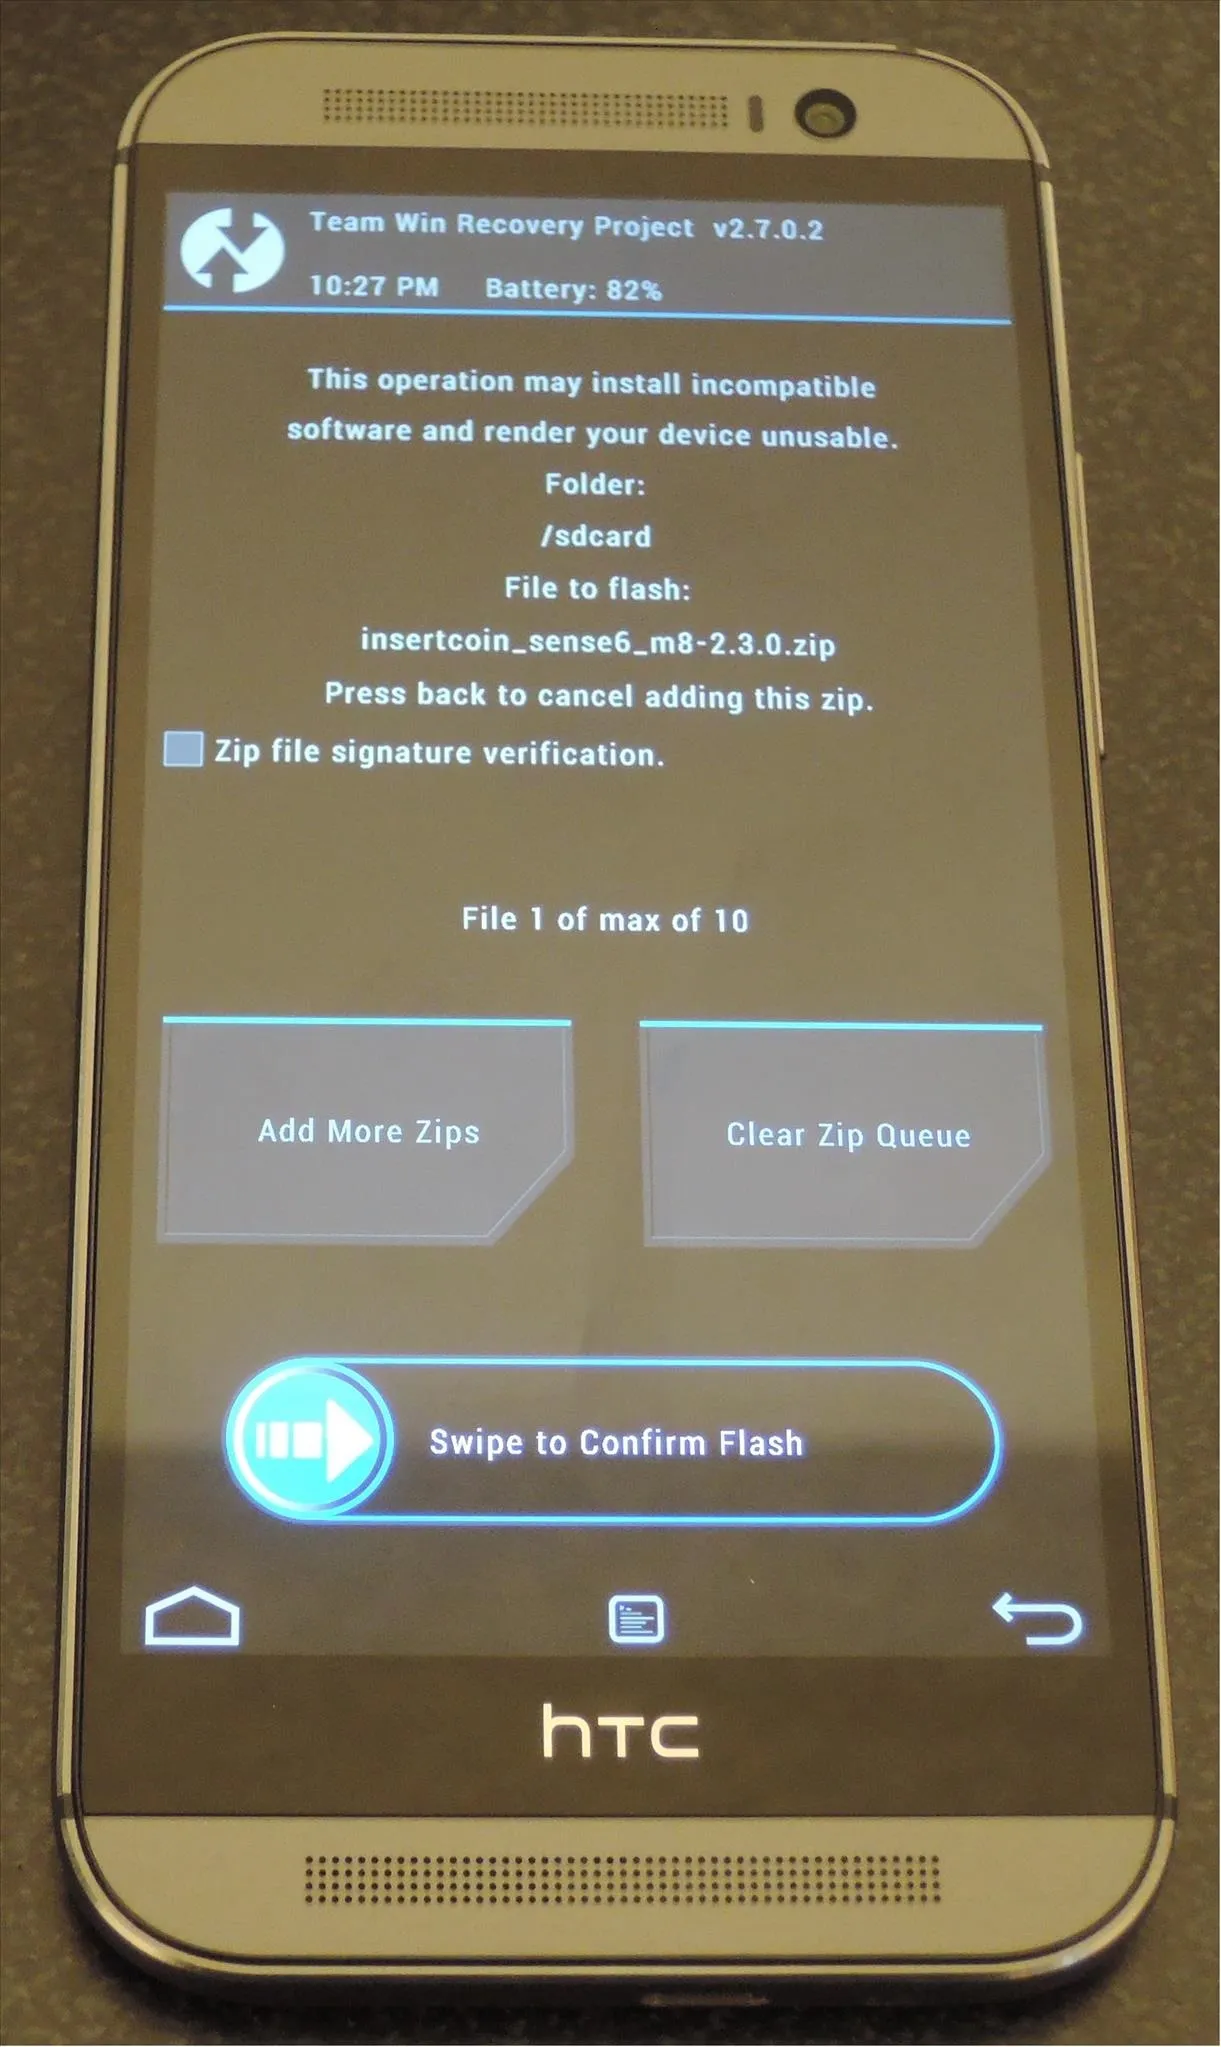


After swiping you will need to go through the AROMA installer to finish the flash. The installer will have extra options and tweaks that you can choose to add to your device, but those are only needed if you plan on keeping this ROM after flashing. Once the process completes, select the Reboot option.
Set Up Your ROM & Reenable USB Debugging
If your device doesn't boot as quickly as usually, don't panic, that is expected. Once it boots back up, go through the initial setup process one more time, as you did when first got your phone. Once your phone is set up you will need to reenable USB Debugging.
Preparing Your Device & Downloading Firewater
Plug your M8 to your computer and open up terminal. You'll also want to download the S-Off tool Firewater and place it on your Desktop.
Run Firewater on Your Device
- Reboot your device using ADB.
- adb reboot
- Once rebooted, push Firewater to your device.
- adb push Desktop/firewater /data/local/tmp
If you didn't put Firewater on your Desktop, you are going to need to change it to the appropriate directory.
- You'll now need to change the permissions of Firewater so that it can run on your device.
- abd shell
- su
- chmod 755 /data/local/tmp/firewater
After typing su, check your device to see if your Superuser app asks for your approval.
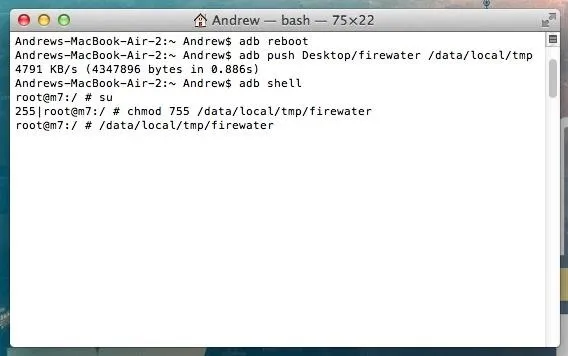
- Run Firewater, and do not touch your device after the process starts.
- /data/local/tmp/firewater
- Now simply agree to the terms and conditions when prompted by typing "yes", then let firewater start chugging.
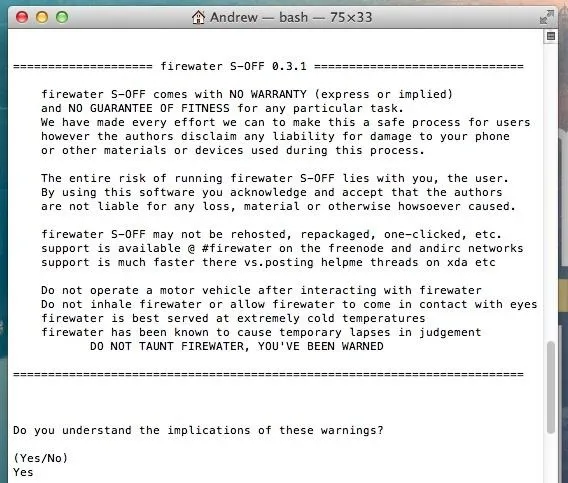
You're all set, your M8 is now S-Off!
Now you are all set to flash custom firmwares, radios, hboots, and lock/unlock your bootloader at will. This will also come in hand when you run into boot issues or just need to return your One to factory settings. Be sure to leave me a comment below if you run into and issues.







Comments
Be the first, drop a comment!