I don't know of a pain greater than of the one felt after cracking the screen of your phone. After I managed to crack my screen, rendered unusable, I immediately began to panic as to how I was going to recover all of the photos, videos, and documents stored on my device. After a few hours of searching, I came upon a thread by Mohamad Sabra that showed exactly how to alleviate my problem.
Outlined in his thread is a method of deleting the pattern unlock key from your system, which in turn will remove your phone's security. While this is great for those of us plagued with a useless touchscreen, this same method can be used by thieves, so if you are worried about your privacy being hijacked, I would suggest switching to a PIN code or password protection.
Limitations of This Method
This method requires a PC and a rooted Android device that can be recognized by ADB. That means that you will have to have had USB debugging enabled before the device was damaged (unless you have a custom recovery installed).
So far, I can confirm that this method works on both the Nexus 4 and 5, both the HTC One M7 and M8 (Google Play Edition and Sense-based variants), and the OnePlus One, but your mileage may vary.
Note that if your screen if fine, but you simply can't remember your pattern, go ahead and guess incorrectly. After 5 attempts, you'll have the option to enter your Google credentials to gain access to your device.
Flash a Custom Recovery
Since your device is already rooted, I will assume you have an unlocked bootloader as well, so installing a custom recovery like TWRP will be a piece of cake. To get started, plug your device into your computer and restart it into bootloader mode by pressing and holding down the Power and Volume Down button for 15 seconds.
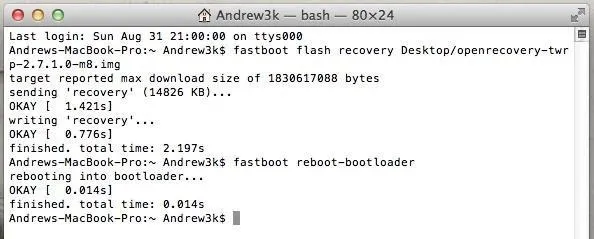
Now that you are at the bootloader menu, you can download TWRP and flash it through command/terminal.
fastboot flash recovery location-of-TWRP.img
After the flash completes, reboot your device into bootloader mode:
fastboot reboot-bootloader
Reboot into TWRP
Now that your device has TWRP installed, you will need to reboot into Recovery Mode. To do that, select HBOOT from the bootloader menu, then select Recovery.
Check Your Connection
After TWRP has started, make sure ADB can still read your device by running the device list ADB command:
adb devices
If ADB does not recognize your Android, you will need to restart the service by killing and restarting the ADB server:
adb kill-server
adb usb
Now you will need to reconnect your device to your computer and re-run the adb devices command.

Erase Pattern Security
You are now all set to remove the pattern lock from your device. This command is also entered from the command window, but it will not provide a confirmation message that it has completed successfully.
adb shell rm /data/system/gesture.key

You can now restart your device by first holding down the Power button until your device powers down, then power it on like normal.
Retrieving Your Data
Your device will now be free of its pattern lock, even though the secure lock screen is still active. Despite showing the security pattern prompt, your computer will still be able to read the contents of your internal storage through Android File Transfer (for Mac) or Windows Explorer.
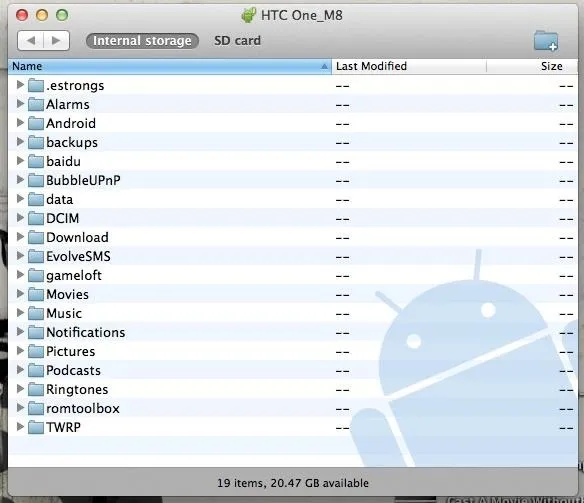
With access to your files, you are free to download and back up all of your data before trashing your device for an upgrade or sending it for repair. As I said earlier, this can be used by thieves to gain access to your data, so if that worries you, I would suggest switching to the traditional PIN code security method.
Did this method help you retrieve data from a broken device? Let us know in the comments, or via Facebook and Twitter.







Comments
Be the first, drop a comment!